How We Optimize Closet Space in This Little House

It's August and lots of folks are moving, so I thought I'd share with you some of my favorite tips for maximizing storage and keeping closets organized. That's where the real magic happens in small houses. Closet space is a big deal, and when you don’t have an attic, basement, garage, shed, linen or coat closet, you've got to really utilize what you do have.

Despite all our house’s storage shortcomings, our master bedroom picks up a lot of slack with TWO good-sized closets. When I say “good-sized” I mean we can step inside, close the door, and still breath. A first for me! Some may call these “walk-ins”, but RubberMaid’s closet design tool informed me that our dimensions don’t technically qualify for that much-sought-after distinction. Technical, shmechnical, though – I’m walkin’ in, I tell ya!

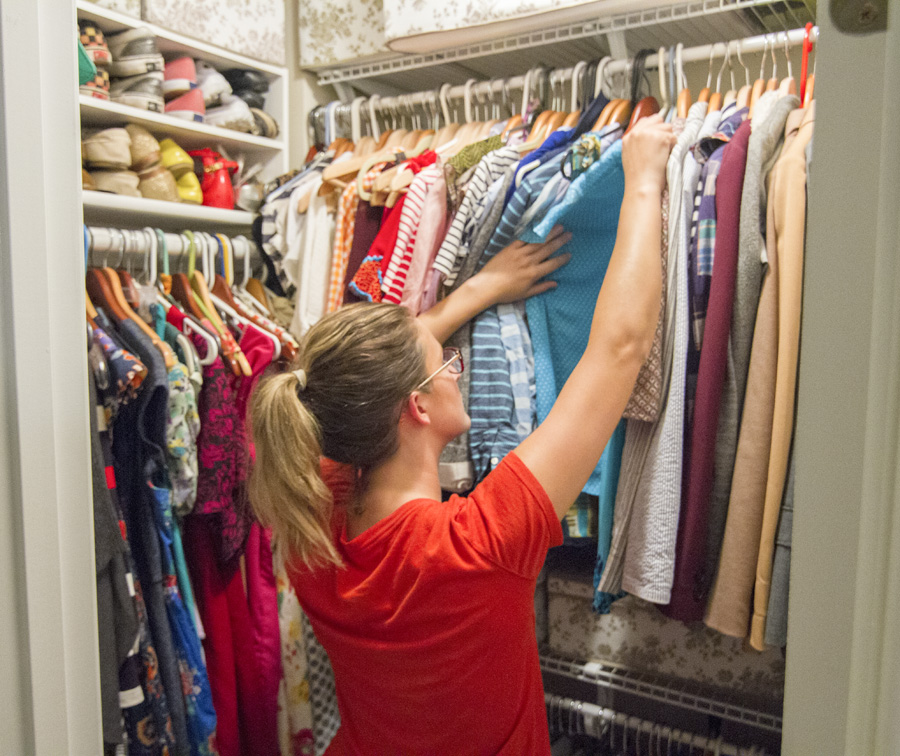
Me standing in my not-quite-walk-in closet. 

His & hers closets were never on our list of must-haves, but it’s a pretty awesome perk that we were spoiled with at our last place too. I’m sure there’s a study somewhere out there showing that separate closets make for happier couples. It just makes things easier!

Bringing the final count up to 3 is the closet in the guest room, where all the household misfits go to die. All three closets came with the default wooden shelf & rod that I’m sure you’ve encountered at some point. Trying to store our stuff in that setup was like trying to fit a square peg in a round hole. If this was the optimal storage setup, there wouldn’t be an entire industry dedicated to organizing your closet, ya heard?!

I ripped the wooden shelves out on day 1 (more on that process at the bottom of the post) and replaced them with ClosetMaid & RubberMaid systems. We passed on the add-ons like pull-out drawers and hampers, but we could always add them down the line if we needed to. Storage bins are doing the trick for now, and we have the flexibility to change it up and move stuff around as our storage needs change. 

Speaking of storage needs, each closet has a different configuration because they store different types of things. The first step to making your closet work better for you is to take account of everything you want to put in it. I start by separating everything into piles so I can get a better sense of what takes up the most space, what’s most abundant, & what modes of storage they each require (e.g. hangers, shelves, bins, hooks). Taking inventory allows me to allocate space efficiently. 

Here are the three set-ups we've got going on. None of them are going to be winning any beauty contests, but they're organized and efficient.

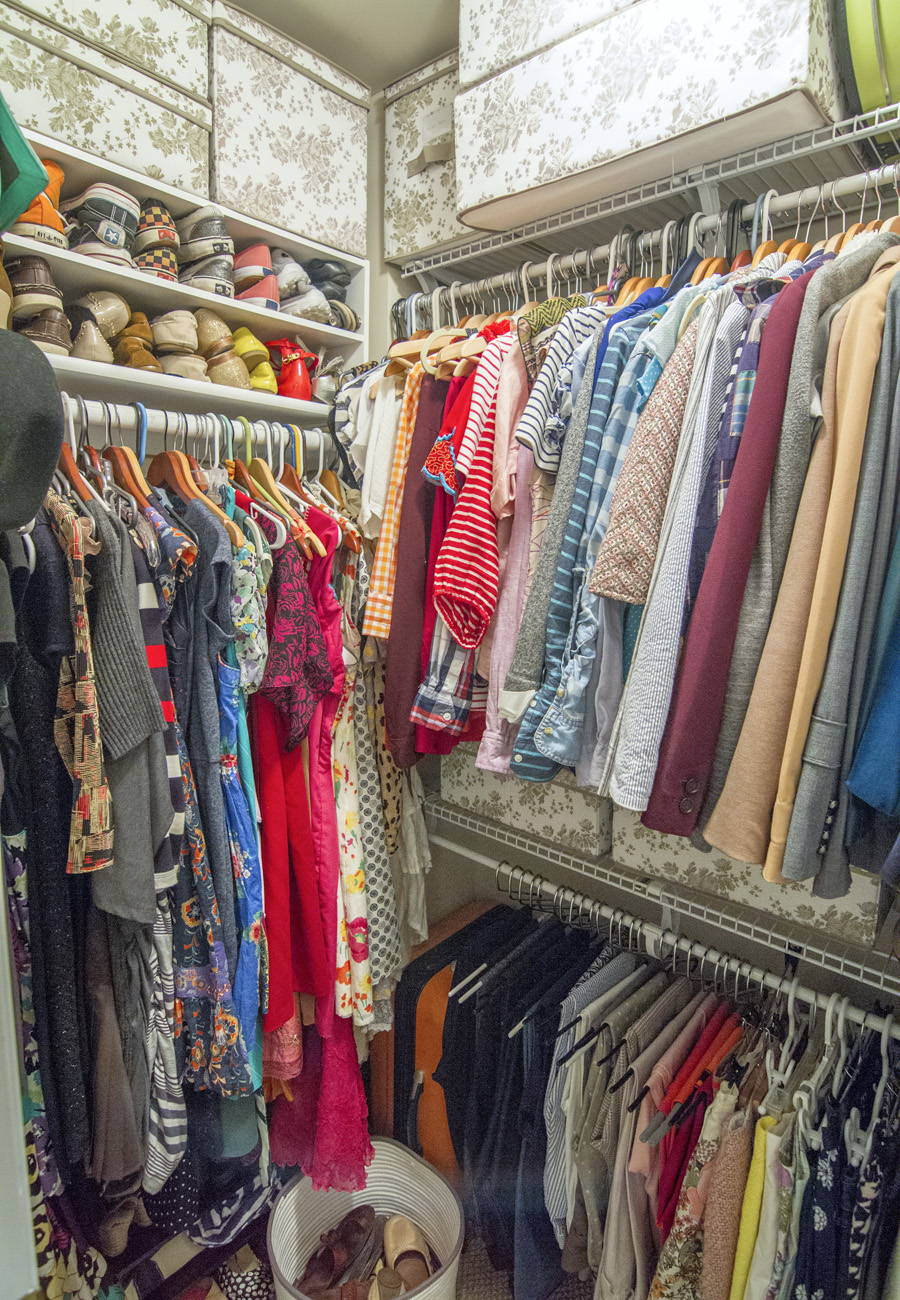
My preferred set up for closet organization
Eli's preferred set up for an organized closet
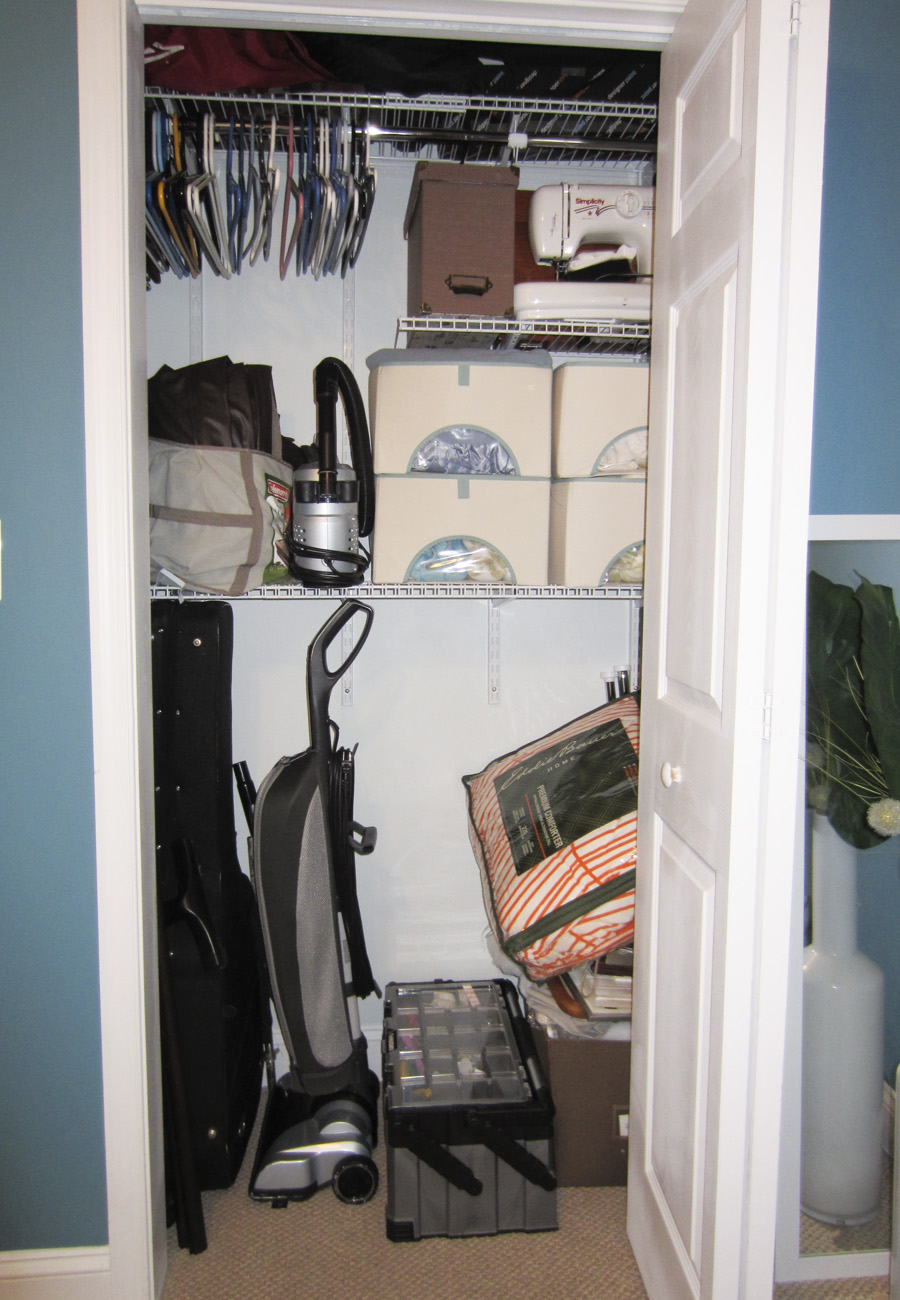
Guest room closet – how we currently store all our guest bedding, linens and other odds and ends

Closet 1: The Fashionista

80% hanging : 20% shelving

I can't believe Eli has so many clothes. SIKE! My closet betrays my clothing obsession. As a toddler I’d change my outfit 10 times a day, as an adult I’ve cut back to 3, but still – I wear a lot of clothes. Sure, I could probably scale my wardrobe down a tad, but why? This closet can handle it and stuff pops back into style when you least expect it (says the girl wearing a fanny pack and jellies).

The #1 best thing you can do if you’ve got a lot of clothes to hang is install a second rod. Since I have more tops ’n bottoms than anything else, I installed two rods on the longer wall and instantly doubled my space for hanging. I positioned the top rack about 10 inches higher than the original wooden one to allow room for storage on the bottom shelf. Very tall people (like the guy I live with) might want to push the shelf even higher to accommodate longer clothing. I can comfortably reach the clothes on the top shelf, but I keep a small folding stool next to the door for accessing the bins above it. If you’re renting and can’t go whole-hog on a closet system you could just get an adjustable shower rod to anchor in and then patch the holes when you move out. 

A second rod doubles hanging space

My #2 tip for organizing hanging clothes – at the risk of seeming anal retentive – is to sort by type (i.e. blouse, jacket, skirts, pants, dresses) and then by color. Color-cloding (a term I just made up for color-coding your clothing, obvi) is seriously a time-n-money-saver. I can quickly see all my options for red shirts, blue jackets or pink pants (I have no fewer than 3 pairs). My less-worn items aren't pushed back to Narnia never to be seen again, so it saves me money when I'm not accidentally buying something I already own. #firstworldproblems

Tip #3 is for those of us who live in an area that has these crazy things called “seasons.” DC is one of them, maybe your town is another. LA, I hate you – skip to #4. I switch my closet twice a year to save space and avoid looking at wool sweaters when it’s 95 degrees out (they're just depressing). The two long storage bins on the top shelf are amazingly spacious (hence the 6" overhang) and they house all my out-of-season clothes (save for coats, which live in a wardrobe downstairs). The other bins hold my winter shoes, swimsuits, handbags, scarves, leotards and wigs. You know…the usual. 

Tip #4: Save your back and get your shoes off the ground. Is anyone surprised that attempts to keep your shoes organized on the floor of your closets lasts about a day? Who wants to kneel down to meticulously place your shoes while taking 5 dresses to the face? I set this RubberMaid shoe shelf above my third clothing rod to keep the kicks I wear most within easy reach. There’s a second one below my dresses for the heels I’ve all but banned and a basket for wrangling unwieldy flip flops.

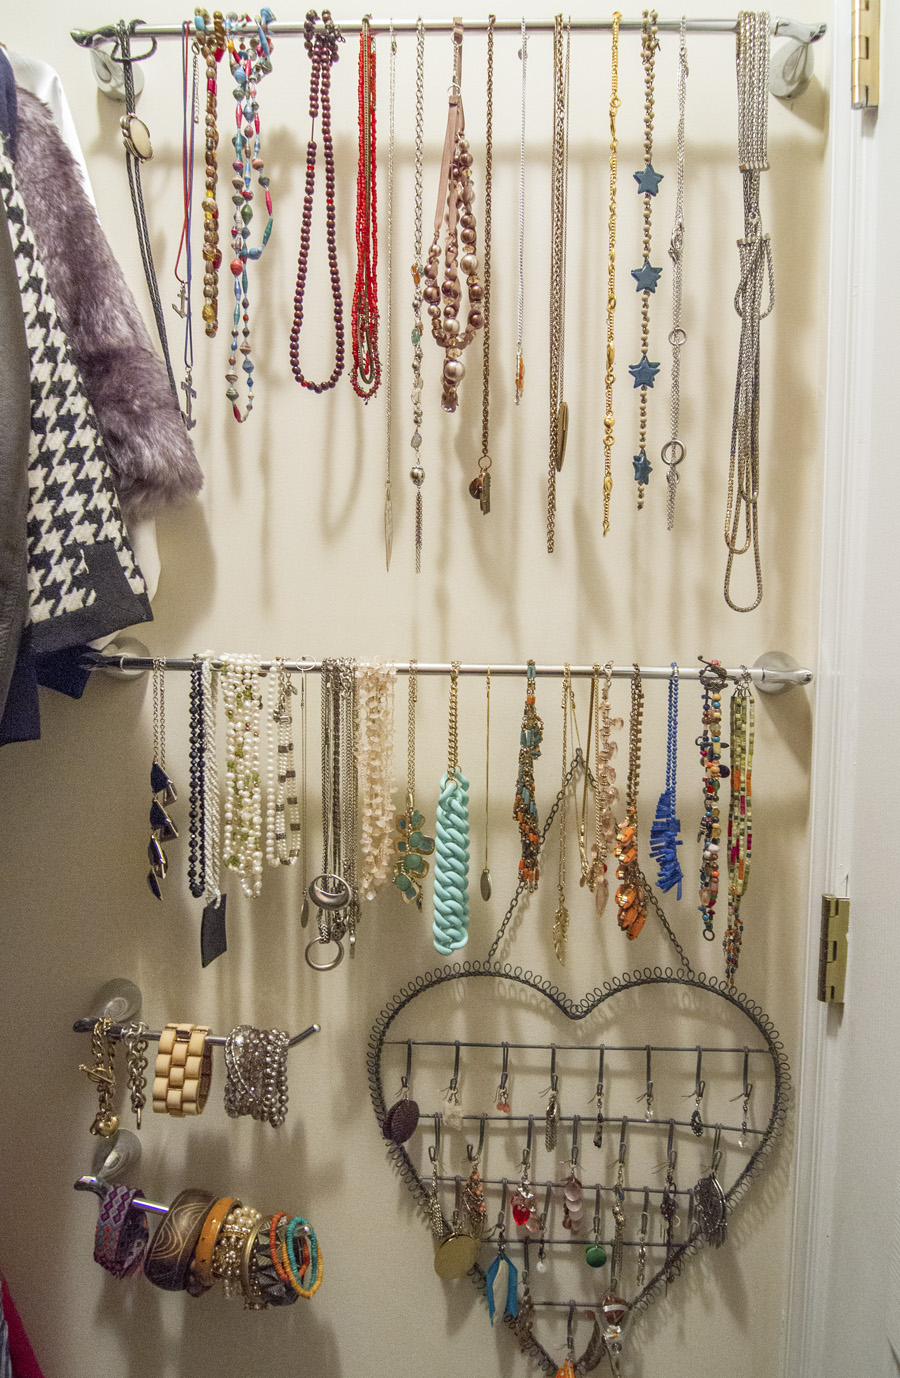
Towel and toilet paper racks are re-purposed for jewelry organization
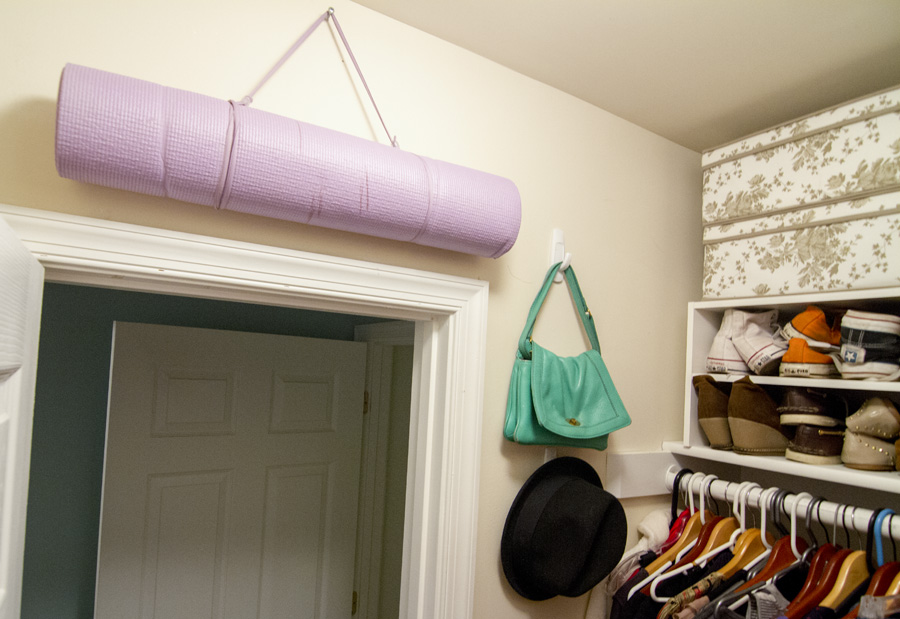
Command hooks make useful storage out of closet walls
Storing shoes at eye level makes it more likely you'll keep them organized

Tip #5 is the same one you've heard from me time and again: Use the walls! Remember when I showed you my bathroom and mentioned that I had to replace the towel racks immediately? Well, waste not, want not. Those puppies found new life as jewelry organizers on my closet wall. My necklaces no longer get tangled and I can grab some bling while I’m choosing an outfit. Efficiency! Trying to camouflage all those colors and styles in the bedroom never worked well for me anyway. Command hooks hold my fedora and whatever handbag I’m crushing on at the moment, (the cross-body strap on this one is folded and tucked into the purse so it hangs shorter). My yoga mat is straight chillin' on a simple screw above the door, and I still see walls, so there’s room to expand! ; ] 

Closet 2: The Gear Guy

50% hanging : 50% shelving

Eli has far less apparel than I do & way more “gear” of the camping and camera varieties. Different stuff calls for a different closet configuration! He carved out half for hanging and half for shelving. His closet looks more orderly than mine because he has fewer clothes, but even still, his clothes look neater because they're on matching hangers – that’s tip #6, folks! I like wooden hangers because they're clothes-friendly, but they do take up more real estate. Given the size of my wardrobe, I may need to invest in slim hangers for my own closet.

Matching hangers make a big difference by creating a clean look in your closet

Eli's camping gear is contained in his pack above his shirts and all his luggage is nested like Russian dolls. His accessories are organized with specialty hangers and hooks on the back wall for really easy access, a carabiner holds his murse, and his out-of-season clothing is in the bins on the top right.

The top shelves in Eli's closet go to his once-in-a-while items

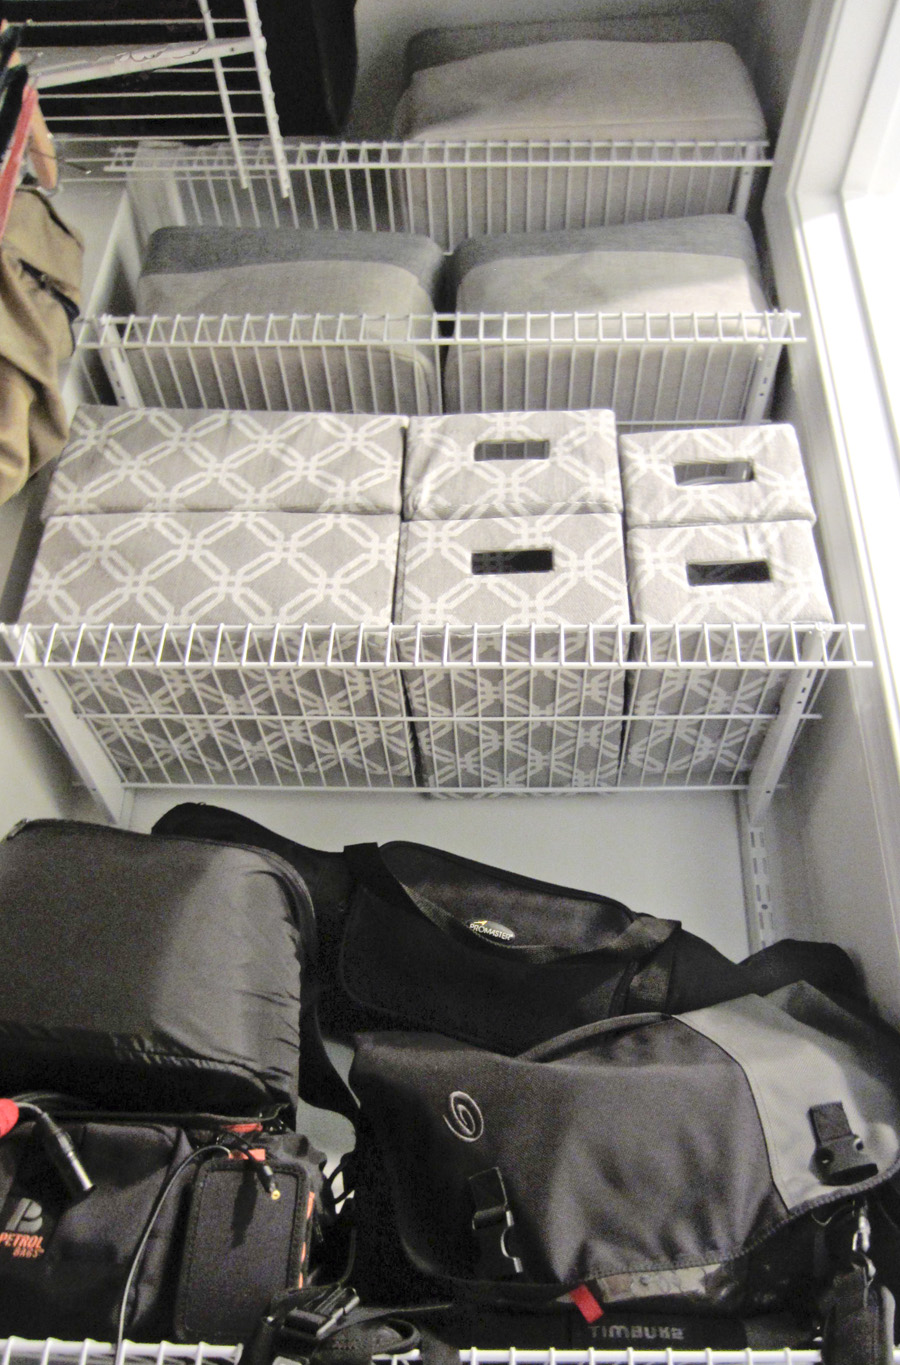
The remaining shelves are devoted to shoes and camera gear. Storage boxes help to keep wires, lenses, and mics manageable. The black bags go in and out pretty much every day, since he needs that stuff for work. Keeping them on the middle shelf minimizes the hassle of lugging them in and out.

Eli's camera gear is organized in bins and bags
The bottom half of his shelving wall

Closet 3: Misfit-Landia (aka "The Guest Closet")

5% hanging : 95% shelving

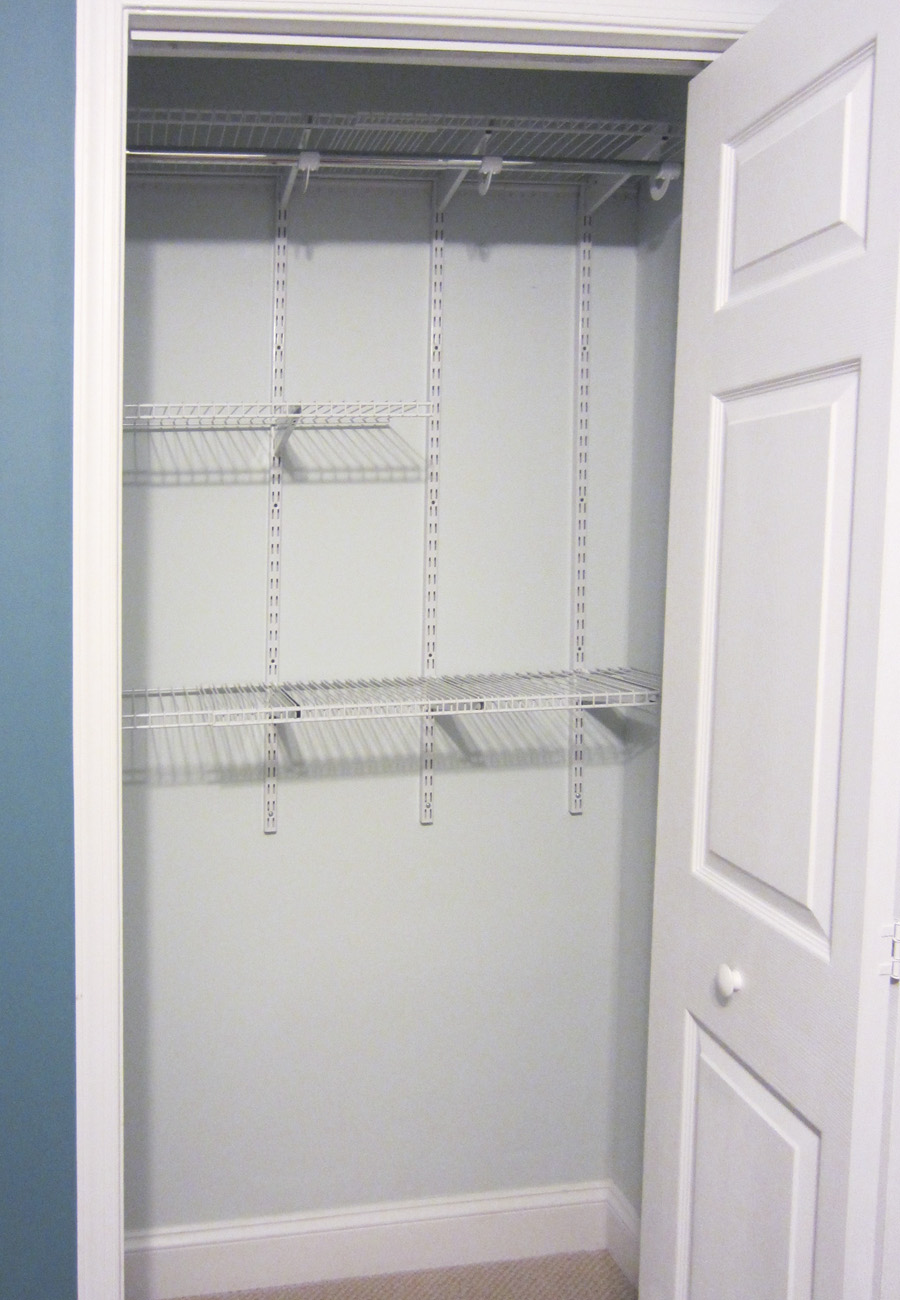
Last and absolutely least: the guest room closet. To my future guests, don’t get your hopes up. This closet is fully ocupado for the time being. It holds all the guest bedding, towels, pillows, and air mattresses, the vacuums, the toolbox, leftover materials from past projects, as well as the sewing machine, spare curtain rods, Eli’s old guitar and sleeping pads. Whew. I imagine the nickname “misfit-landia” is starting to make sense to you... But don’t fear – someday (after we build a shed and storage daybed) this closet will look more like the photo on the left: clear, welcoming and ready for your weekender bag. It's all patched and painted for when that day comes. 

Empty guest room closet
The guest room closet – aka land of the misfits

How We Prepped for the Closet Systems

There was a bit of a learning curve to bust out the old shelf without putting dents and holes in the drywall, but third times a charm. If you’re stuck in an unhappy relationship with your wooden closet, this is the best way we’ve found to remove it and prep for a more modern system. This post is already jam-packed with pictures of closets, so I've consolidated the step-by-step photos in this gallery. Instructions are below!

Step 1: Unscrew and remove the wooden rod. Then take a box cutter and cut around the outline of the shelf and shelf support – every where wood meets drywall. 

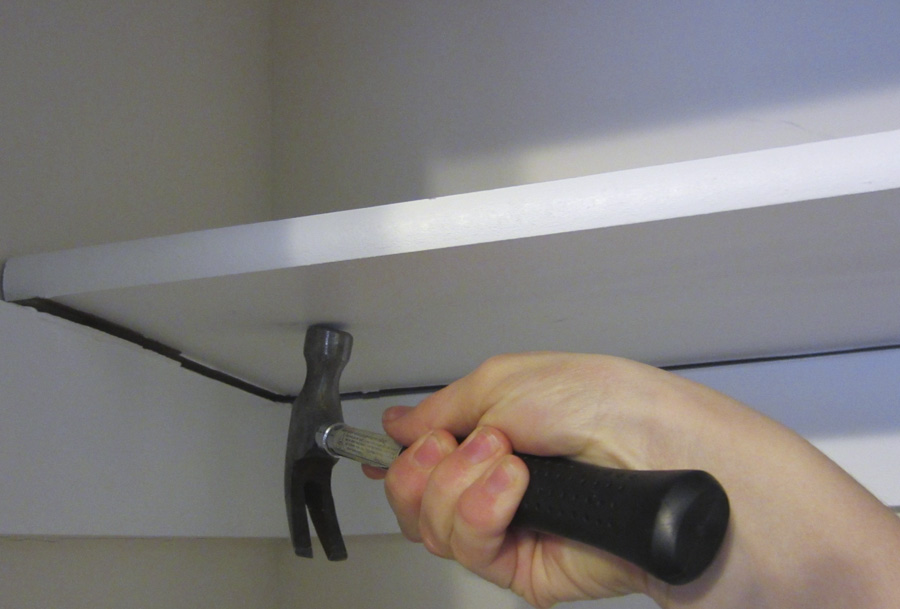
Step 2: Use a hammer and some strong upward momentum to hit the bottom of the shelf. You want to direct the force along the edges close to the wall (without hitting the wall, of course). It will likely take multiple swings, but eventually you’ll dislodge the nails securing the shelf. Once you do, carefully remove the shelf and any nails still laying around. 

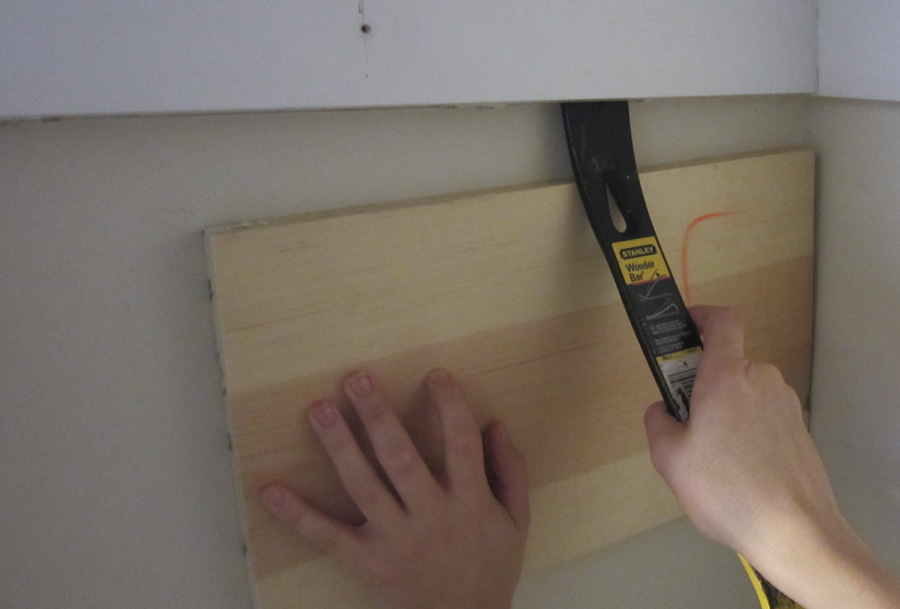
Step 3: Pry the wooden support off the wall. This is where we ran into issues with putting dents & holes in the drywall. But never again! For the guest closet we used a crowbar, a scrap of wood and a hammer. Tucking the crowbar into the crease between the wood and the drywall, we placed the wood behind the crowbar and used that as our leverage for prying. The wood evenly distributed the pressure – saving the drywall from a rocky future. 

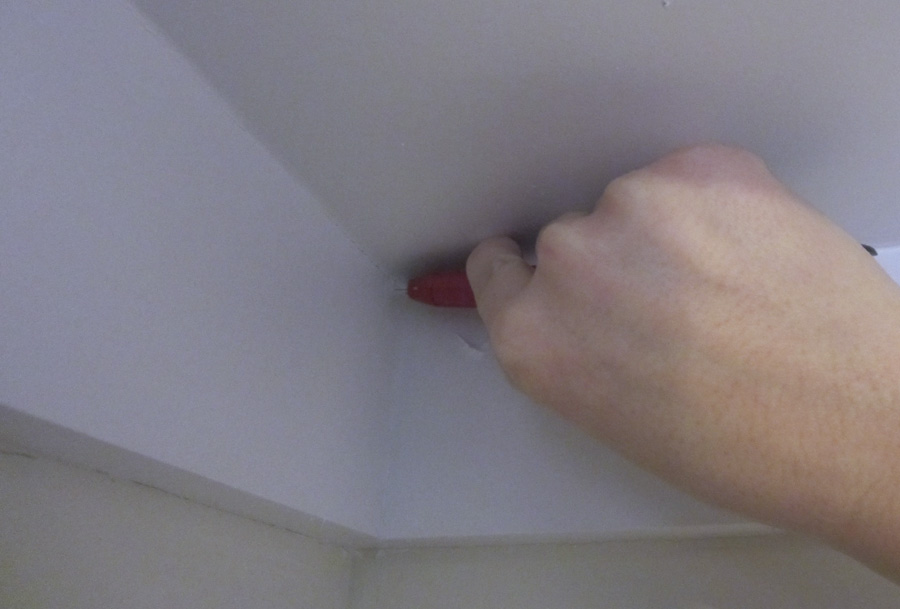
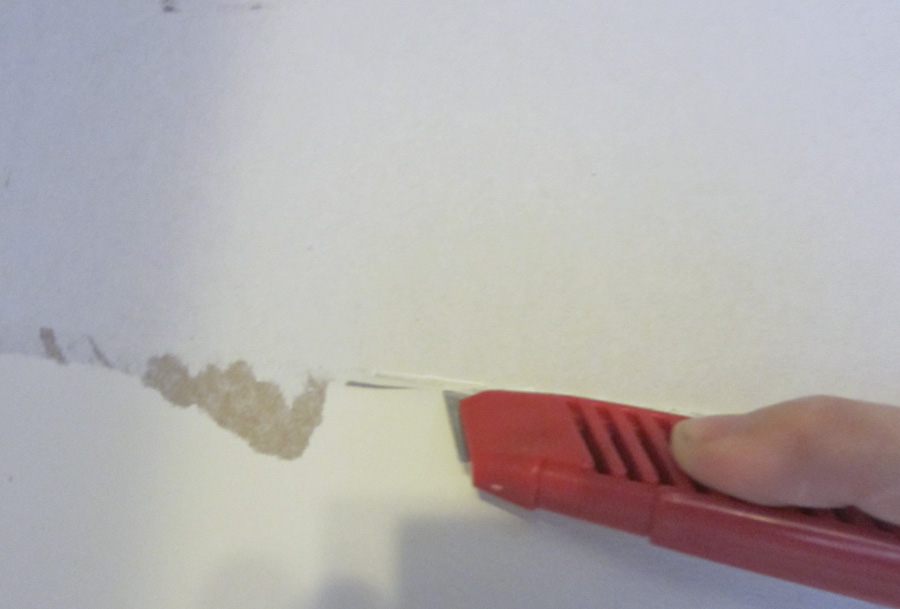
Step 4: Once the supports are gone, you’ll usually find a lip outlining where they once were. That would be caulk, and you can use an exacto knife to lightly cut around it and peel it off.

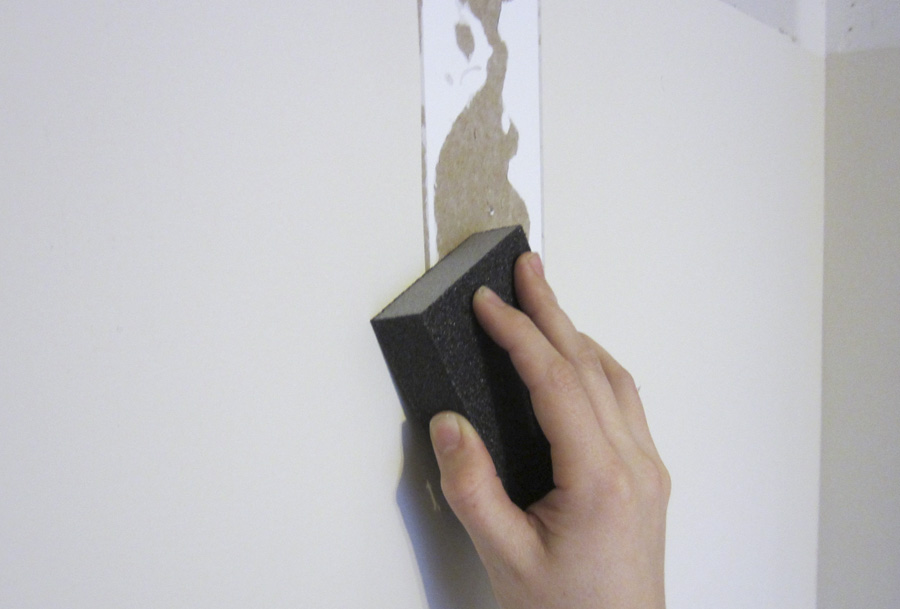
Step 5: It’s likely some of the drywall’s paper backing ripped off and there are probably some uneven spots. I just spackled and sanded these areas to get a smooth finish.

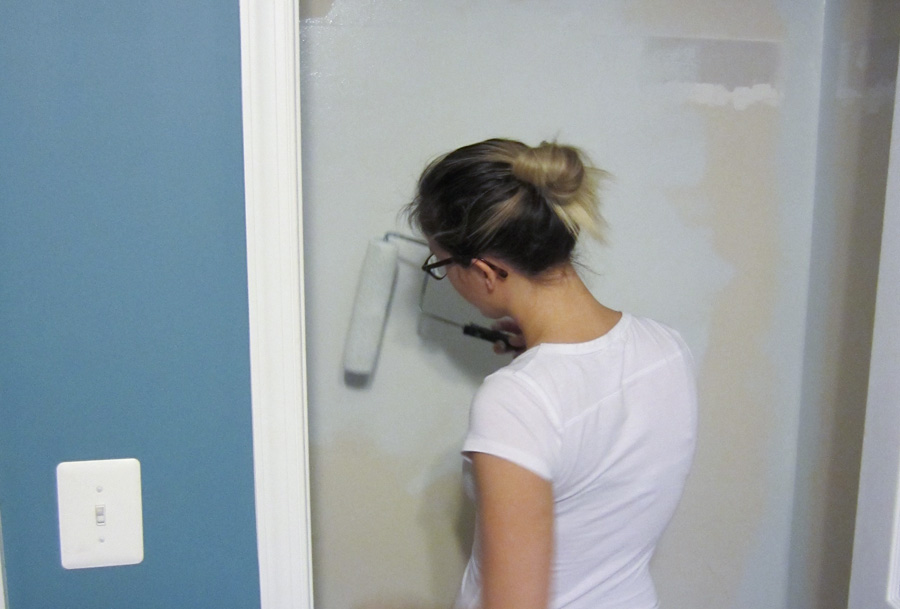
Step 6: After cleaning up the dust and wiping down the walls & baseboards, I applied two coats of the paint leftover from our master bath (Drizzle Sherwin Williams 6479). It’s a nice neutral that reflects light but doesn’t tint everything in the closet a weird shade. In case you were wondering, I painted the ceiling too (not that you can see it...)

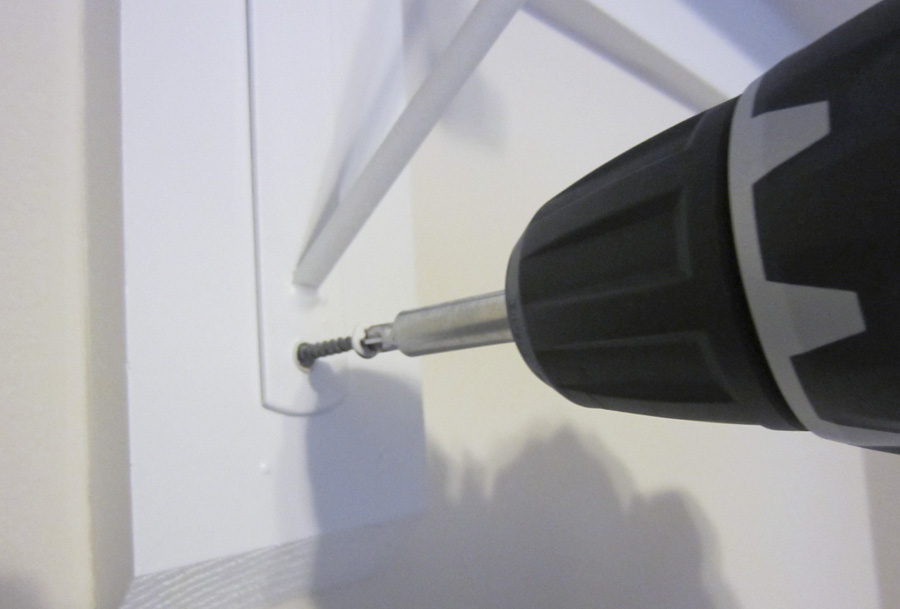
Step 7: Install the closet system per the manufacturer's instructions. I allotted minimal space to hanging clothes, since most guests aren’t bring much with them, and the rest to shelving to hold all our misfits.

How to Convert a Platform Bed for a Box Spring

Remember when I showed you how I built a knock-off West Elm headboard? I promised that I'd show you how we got a new, classy bed frame fo' freezy but then I left you high and dry for 2 months! Alas, life imitates art. I finished building my headboard months before I actually got to enjoy it on the wall (leaning against the wall beside the bed doesn't count). I'd look at it sitting on the floor every morning and think, "Someday you'll get promoted, kid"... its fate was in limbo til I could find the right bed frame.

The frame needed to be modern, on legs, without a headboard or footboard, and it needed to accommodate a boxspring without making the bed 4 feet tall. In case you didn’t guess from the italic-bold-combo, that last one was the kicker. I quickly learned in my search that platform beds (so named because they provide a wooden platform for the mattress to lie on) are now officially “the rage.” Apparently that box-spring that cost me extra was now being deemed by the bed-sellers of the world as redundant. Ugh.  

I love my box spring. They've come a long way from the days of hard metal coils – it's far better at evenly supporting my mattress than any platform, and I sleep easier knowing I'm not invalidating a warranty on a pretty expensive mattress. This trend toward platform beds is problematic for box-spring devotees like myself because we’re forced to either throw out the ‘spring, stay married to the bed skirt, buy a new "low-profile" boxspring or sleep like “Princess & the Pea” 10 feet in the air (obviously hyperbole – my ceilings are only 8 ft). I give you Exhibit A, in which I try on a cheap metal platform bed for size:

Super tall bed when using platform, boxspring, and mattress

Bahaha. Nope. Not pictured is my ceiling fan hanging a mere 3 feet above the bed – I can see the headlines now: "Girl Wakes to Biggest Nightmare, Beheaded by Ceiling Fan." That meant this simple option I liked from West Elm was out of the question – 8" too tall and, even still, the $399 price tag was hard to swallow.

That is, until Eli sent me a Craigslist curb alert for this exact frame. YAHTZEE. That, my friends, is what we call freakish luck, but i-dont-hate-it. I wasn’t gonna spend $400 on a frame that didn’t fit my needs, but I'd happily take it for $Free.99 to try our hand at reconfiguring it. Worst case scenario, we'd totally ruin it and be back to where we started. I was fairly convinced that's exactly what would happen, and I didn't really want photographic evidence if it did, so I was a bad blogger and left the camera in its case. Tsk, tsk. You could say I was pleasantly surprised when it worked, and I'm kicking myself for not taking photos. We've been sleeping on it for 6 months now and are well-rested enough to tell the tale. I think there's a lesson here about doubt and faith and bootstraps – lemme know if you find it. 

All this is to say that I have illustrated the process like an Ikea manual so you too can make amends with your boxspring and stick it to the man. Platform beds be damned! (Unless that's what you want...nothing wrong with 'em if you don't want a box spring or don't mind a taller bed) I recommend trolling Craigslist for a wooden platform frame or start fresh with raw lumber – Ana White has some guides for building a bed from scratch.

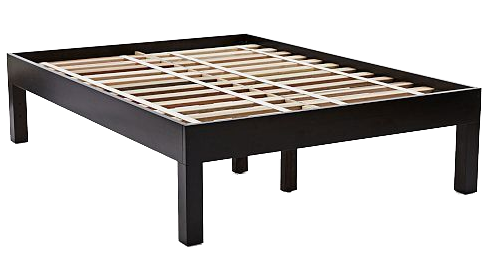
What we used from the West Elm Modern frame for this DIY

Step 1: With the frame disassembled, carefully remove the wood strip (colored light gray here) from the inside of the main frame using a screwdriver and a crowbar. The goal is to preserve the wood strip (and the frame) so you can re-attach it lower down – that means don't Hulk out and break it to bits! This took some doing on Eli's part because the strip was secured using both screws & wood glue (yay – quality carpentry). Much of the veneer chipped off in the process, but we weren't too concerned since no one well ever see it (except I'm showing the whole world at the end of the post...no shame). On a platform bed, this strip is usually an inch or two from the top of the frame and is used to hold the platform for a mattress. We'll be moving it as far down as we can to make room for a boxspring.

Move the supportive strip to be flush with the bottom edge of the frame

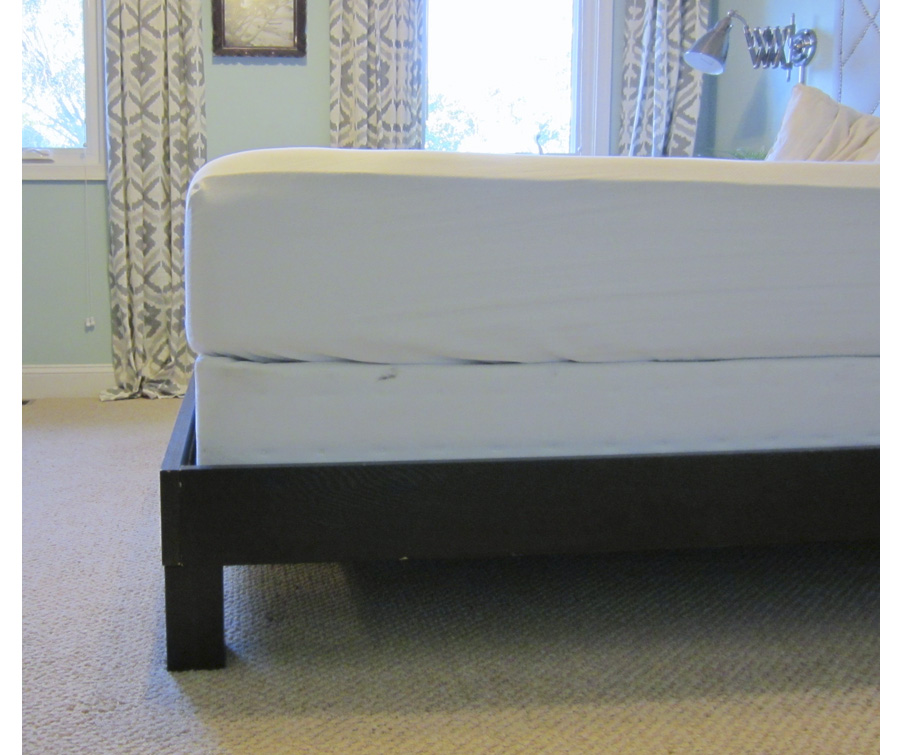
Step 2: Sand the chipped edge of the strip to smooth it out and then use wood glue and the screws you previously removed to re-attach it flush with the bottom edge of the frame. Lining it up with the bottom edge ensured the strip would be level and even on all sides when we reassembled the frame. Depending on the depth of your edges, you can potentially gain a lot of room for the boxspring this way. Our 'spring is 8.75" deep, the outer edge of our frame is 5" deep, and after relocating the strips we had 4 inches within the frame for the 'spring to sit in. That means 4.75" of the boxspring are still peeking out above the frame, but we take what we can get. If your edges are really shallow, these first three steps probably aren't worth the effort and you should skip to step 4. 

Step 3: The bed's legs had notched tops that the edges rest on. This notch also provided two pre-drilled holes for securing the leg to the edges. We measured and cut down the notches so the tops would be flush with the wood strips we had just lowered. This provides one flat, level surface for the box spring to rest on. In cutting down the top, we lost the top hole for securing the legs & edges, which would have compromised the stability of the entire frame had we not also shortened the legs. 

Cut the legs to 6 inches, or your desired height

Step 4: At this point, we've bought ourselves 2.5 extra inches, but you may remember I said we needed more like 8. Gulp. To get us the rest of the way, we cut about 6 inches off the bottom of each leg using our circular saw. This was a little nerve-wracking because we didn't want to end up with 4 legs at slightly different heights (and a lopsided bed) – granted, my nerves were a little more wracked than Eli's ; ] We carefully measured and marked our cut on all four sides of the leg, made the cuts, and then used the palm sander to even out any small discrepancies, giving us 4 equally tall legs. Phew! Cutting the legs down by about half compensated for the stability lost when we shortened the top notches. Less length = less torque, so our bed feels as sturdy and clocks in at 11 inches – an ideal height for our boxspring/mattress duo.

Step 5: Reassemble! We used the pre-drilled holes from the manufacturer to put everything back together. The edges are screwed together with pocket hole screws (we used the drill to widen the pocket holes so our screwdriver could reach further in). Then we set the outer frame up on the legs and used the wooden braces that came with the bed to secure everything. There are 3 drilled-thru holes in each brace – one for each adjoining edge and a third for the leg. These braces are really what's holding everything together – without them the frame would be a wobbly mess and we'd be knockin' on heaven's door every time we got into bed.

Re-assembling the bed frame after lowering ledge and shortening legs

We nixed the center beam that provides a 5th leg in the middle of the bed. You need this leg if you have a king size bed, but after checking online I found that the center support wasn't really necessary for a queen or a full. If we ever decide to add it back, we'd just need to cut the height of the 5th leg and secure the beam to the wood strips with metal brackets. We haven't done that because 6 months in the box spring still seems sturdy without it. Use your discretion :]
The whole project took a few hours and cost less than $5 (we picked up some new screws). It's just what we were looking for! Now I don't have to worry about breaking a hip climbing into bed or getting my head chopped off by the ceiling fan, and my headboard finally got its rightful spot on the wall. I can rest easy now!

Enough sketches. How about some real live photos? Eli helped me remove the mattress and boxspring yesterday so you can see the gritty details (when I say gritty, I mean griiiiiitttaaaaaayyyyy)! 

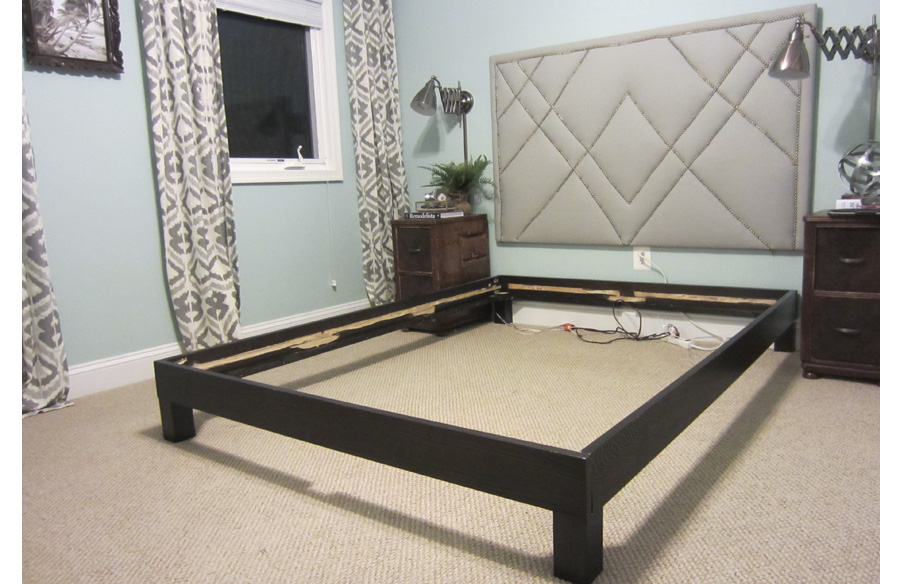
The finished frame and headboard without the mattress and boxspring
Corner of the frame – you can see the mess we made of the veneer by moving the wood strip.
Top view of one corner, showing how the brace holds the leg and edges together

The inside is scary – like a tiger sharpened its claws here – but the outer appearance is perfectly serene. I'm really happy with the finished product and now there are just a couple finishing touches left. I want to find or make a boxspring cover (since half of it is still exposed), get a duvet cover that will be easier to throw in the wash, and upgrade the pillow situation ... ours are getting worn out and I love the look of Euro shams. 

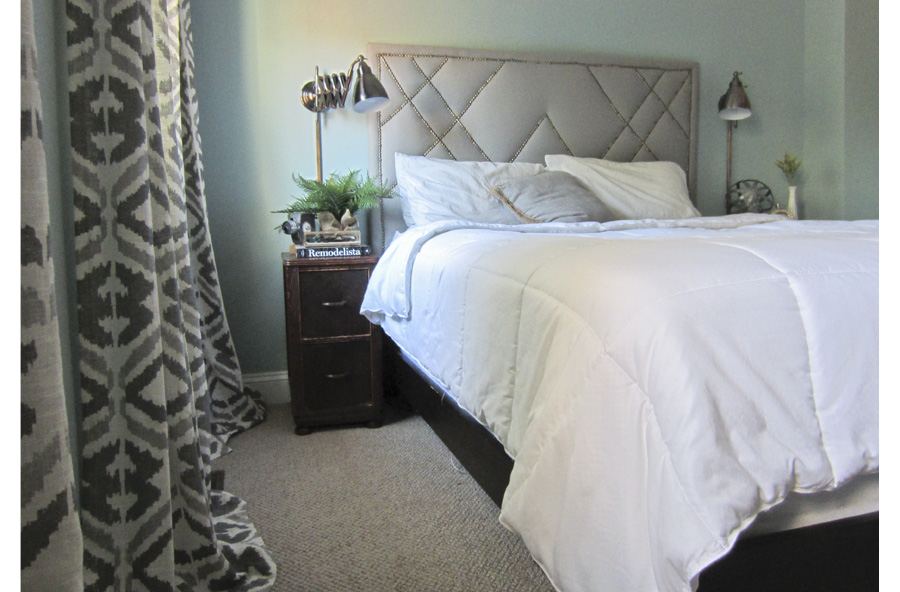
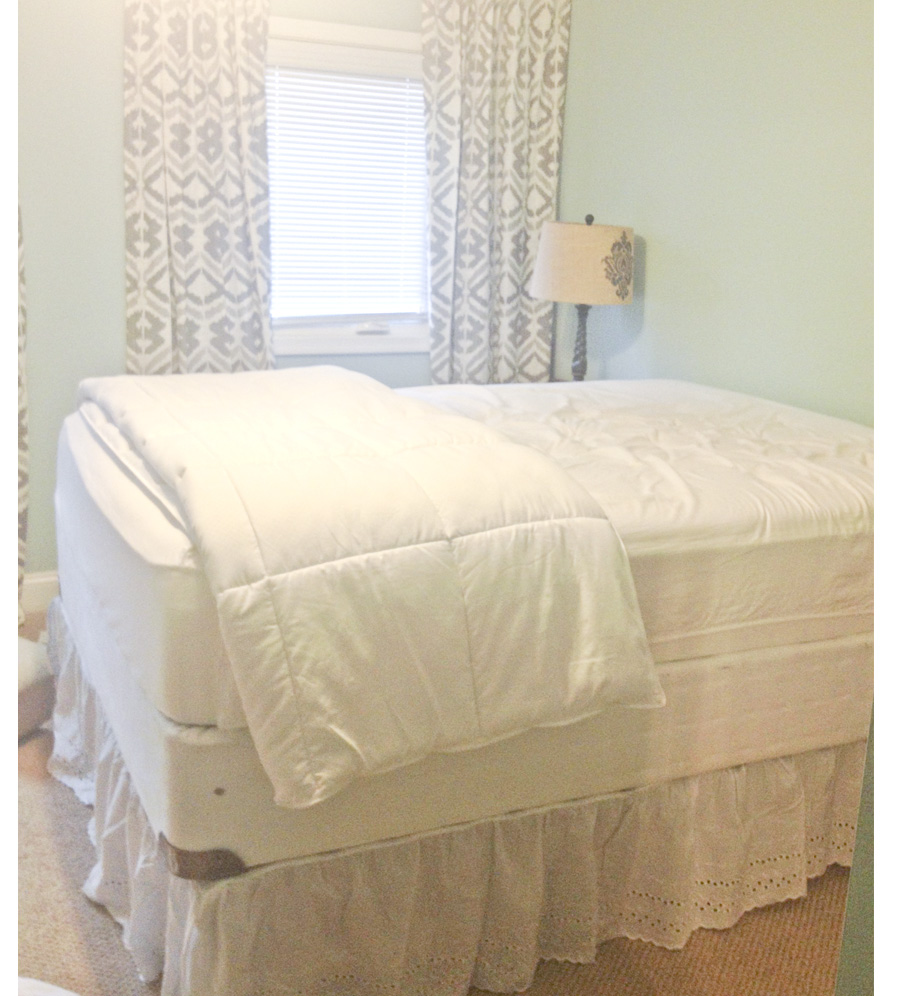
One corner of the finished frame with boxspring and mattress 

The new wood frame is an upgrade in many ways from the metal frame + bedskirt situation we had going on before, but the main reason I switched was to make the room look and feel airier. Being able to see under the bed – or any large piece of furniture, for that matter – adds visual breathing room. I try to keep this in mind any time I'm choosing furniture for our little house. 

So there you have it. Am I the only person still using a box spring?! Has anyone had luck with their platform bed or thinking about reconfiguring their current setup? 

Low Cost & Found: How to Make A Stool From a Lamp Shade

Happy Monday, folks! My most sincere apologies for missing Friday. The week was cray – news was breaking at work, my computer was breaking at home – it was brutal. My hard drive crashed, and it would have been complete devastation if not for Eli, my man of many talents who spent many hours salvaging my files (and forced me to backup in recent months). Watching him do surgery on my computer is a thing of beauty (think computer innards exposed, tiny screws everywhere, miniature screwdriver in hand). So here we are... Monday... perhaps the worst day of the week. Let's hope I can cheer you up with a fun and simple DIY!

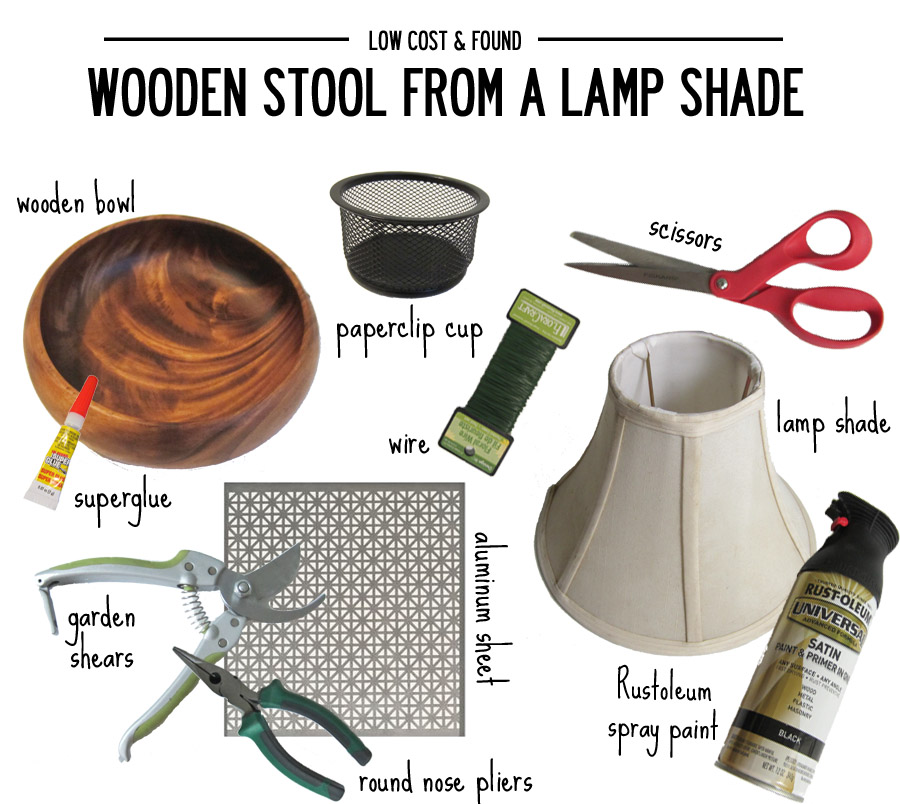
Supplies you'll need for this DIY to turn a lamp shade and wooden bowl into a decorative stool

Two months after sharing my wallpapering adventure, the powder room is STILL UNFINISHED. It's missing two things which are so small and at the same time so important: a hand towel rack/soap holder combo and a stylish stool (more like a miniature side table) on which to set extra toilet tissue for guests, and (perhaps more importantly) add a little styling je ne sais quoi in the room. I had a very specific image in my head of what the stool should look like but after months of looking I concluded it does not exist in the correct dimensions and price range, and so begins a game I will henceforth refer to as Low Cost & Found. It's bascially the MacGyver of DIY, in which I pilfer odds and ends from around the house, pick up some cheap supplies at the hardware store, and put them all together.

In this case, I had a beautiful wooden bowl from Homegoods ($14), a small lampshade that was about 6 inches tall and 4 inches wide across the top (you can find them at Goodwill for $1), a metal cup for holding paper clips, a Union Jack-patterned aluminum sheet ($10 at Home Depot, and enough for several projects), and some 22-gauge floral wire that was laying around the house. With the help of some cutting & bending apparatuses, some spray paint and super glue I made this... no power tools necessary.

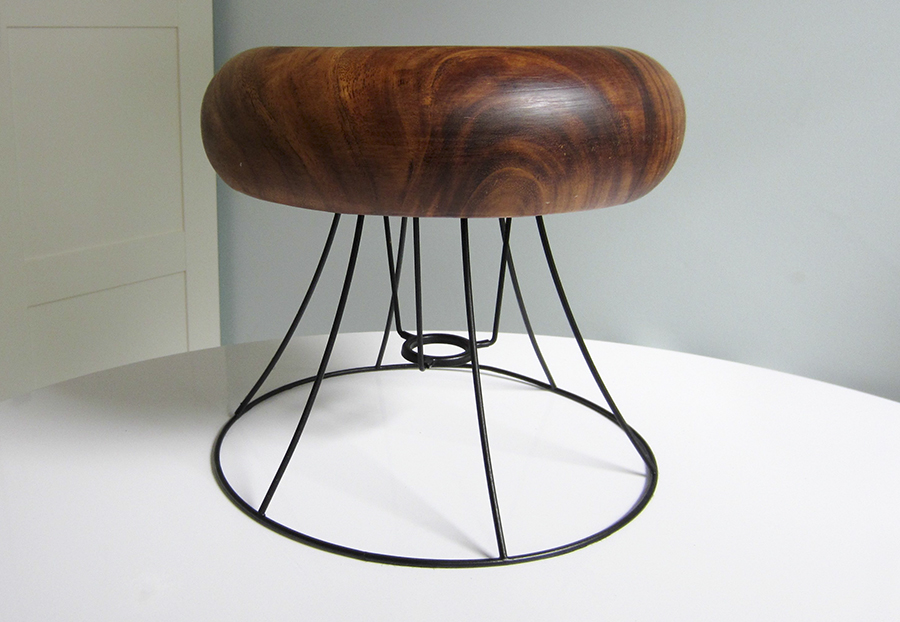
A DIY project, making a stool from a lampshade and a wooden bowl

It's business up top and party on the bottom. I wouldn't stand on it – nor should you or your kiddies (it ain't made for that) – but for a pint-sized decorative stool, he's pretty cute. 

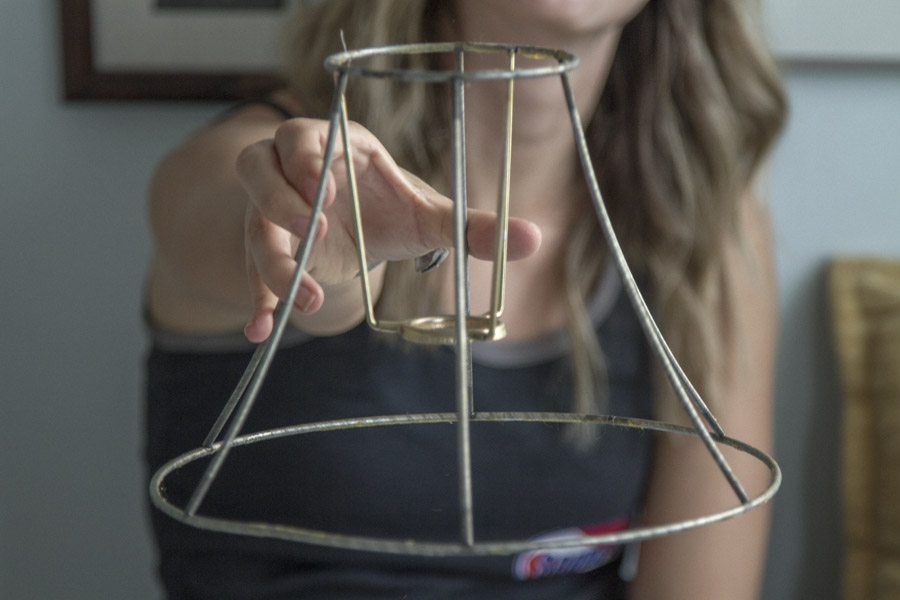
The first step in making it is to free the wire-framed lampshade from its dingy cloth cocoon. I removed it with scissors and then scraped off some really lovely, yellowed glue with my nails and a wet paper towel. I’m not sure whether these old metal frames contain lead (?), so if you do this at home take proper precautions. 

Step 1: Cut off the fabric lamp shade cover
Step 1: After cutting off the cover, give it a slight yank to remove it from the glue
The lamp shade has been cleaned down to its wire base and is ready to move on to the next step.

After cleaning the frame, I applied a thin coat of Rustoleum spray paint in a matte black. It’s paint & primer in one and is well-suited for metal. I let it dry outside for a couple hours.

Step 2: Spray the lamp shade with two light coats of Rustoleum spray paint. 

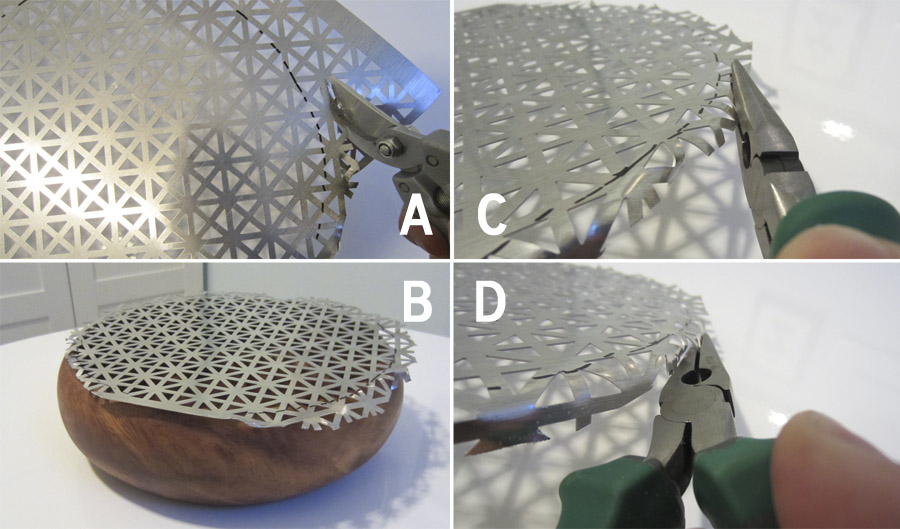
While the spray paint was drying, I marked the outline of the wooden bowl's rim on the aluminum sheet and cut around the circle with my gardening shears (err i mean, metal snippers... don't tell the gardening police). Then I used round-nosed pliers to roll the sharp edges down...giving the circle a curved edge that will fit nicely inside the bowl. I tested to see if the aluminum would fit inside the bowl as I went along, and stopped bending it when it could sit level about an inch below the outer rim. I decided to spray paint this aluminum black, but the silver would have been a fun look, too.

Steps for preparing aluminum sheet

I used a tape measure and Sharpie to mark the center of the bowl, applied a big glob of superglue, and then carefully placed the paperclip cup on my mark, dead-center. I piled on some books and heavy objects to weight it down and let it dry for an hour or so. The bowl had a nice flat bottom, so the cup was able to sit totally flat and level.

Step 4: Mark the center of the bowl and spread super glue to adhere the paperclip cup

This step was only necessary because the depth of my bowl and short stature of my lamp shade meant that my overturned bowl would cover half the shade when stacked on top. Goodbye, lovely curves! It's all about size ratios here and while the stool needed to be short, I didn't want it to look squat. I considered other options besides the bowl – for instance, if I used a round butcher block cutting board instead I could have just screwed it onto the base with some metal braces and called it a day. Unfortunately for me, I really fell for this bowl and decided it was worth the extra effort. So here we are with a total MacGyver move – supergluing a paperclip cup to make the bowl shallower, and hence saving the lampshade from being swallowed up when I stack them together later. Think of it as the bowl's booster seat. :)

Step 4: Attach paper clip cup to the center of the wooden bowl using superglue

While the cup and bowl were getting to know each other, I also applied a thin line of superglue around the top rung of the lamp shade and centered the aluminum sheet circle on top with the curled, jagged ends facing up. This time I used a jar full o' rocks to weight it down and dry, since a book would have gotten glued thru the cutouts in the aluminum. After it dried, I came back with some floral wire, threading it through the cut-outs and around the lamp shade's top rung to make doubly sure the two were secured. I then applied another thin coat of spray paint to the underside of the stool – covering the silver aluminum and green floral wire to get a cohesive matte black.

Step 5: Superglue aluminum circle to the top of the shade
Step 5: I also used wire to doubly secure the the aluminum sheet to the lamp shade

I used my pliers to twist the wire super tight... that baby was goin' no where. Make sure your aluminum circle is centered and level over the shade, because the paperclip cup and bowl are going to rest on top of it to make the top of the stool.

Step 5: Use pliers to tightly twist the wire

The last step is to attach the base and the bowl. I applied a last strip of superglue around the edge of the paperclip cup and carefully fit the bowl over the aluminum sheet, pressing down firmly when it was centered and level. 

Last step is to attach the lamp shade base to the bowl top.

Then I came back with some more wire to thread through the aluminum cut outs and the little holes in the paperclip cup. This was a little tricky (and perhaps not totally essential) because the holes in the cup weren't all that visible behind the aluminum sheet, and they were small to begin with. I used the wire like a fish hook and fumbled around a little til I got it through a hole. Then I twisted the ends tightly, snipped 'em close to the base, and used a Sharpie to color them black. Ooo, tricky, trick-ay.

A close up of the wire that I colored black and used to secure the lamp shade base to the paperclip cup/wooden bowl.

And there you have it, folks! An adorable little stool made almost entirely from stuff I found or picked up on the cheap. Look how perfectly it presents the spare TP!

Finished product in the bathroom

Sure, there aren't any small animals in the house to appreciate the cuteness of the underside, but I'm always prepared...just in case.

View from below: the aluminum sheet, spray painted black, gives a fun textured look.

The wallpaper is so bright and whimsical (which I'm still lovin', BTW) so the dark, rich wood helps to ground it with a level of seriousness, while the curvy bowl and wire base fits in with the playful nature of the room. 

My new DIY-ed stool, made from a lamp shade and wooden bowl

I'm so relieved that I can stop searching for tiny stools to fit in my tiny bathroom! Now I just need somewhere to hang that stinkin' hand towel! My combo soap holder/towel rack may turn into another game of Low Cost & Found, since I can't for the life of me find what I'm looking for. 

Finished DIY lampshade stool in the powder room

What did you guys get into over the weekend? And fun low cost & founds of your own? Hopefully no computer crashes...