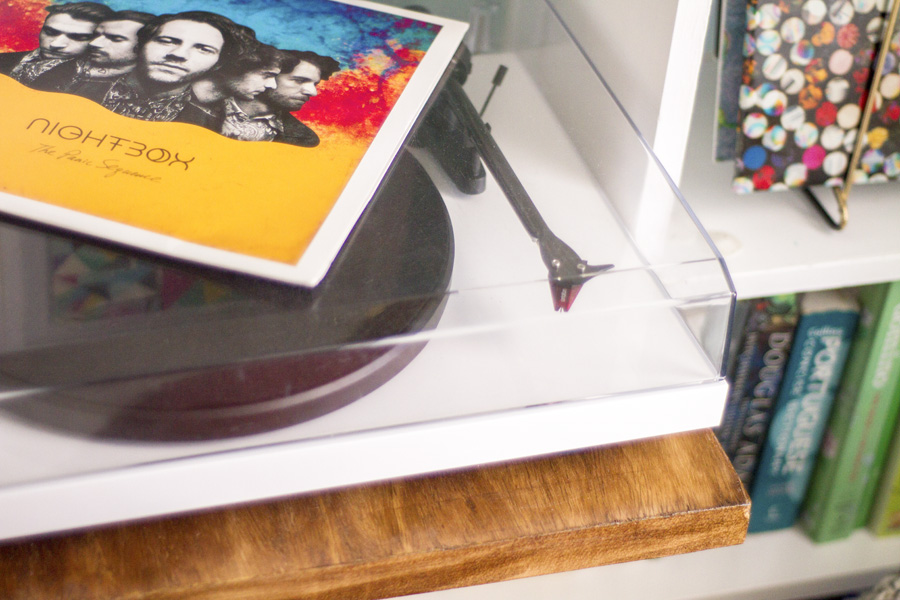
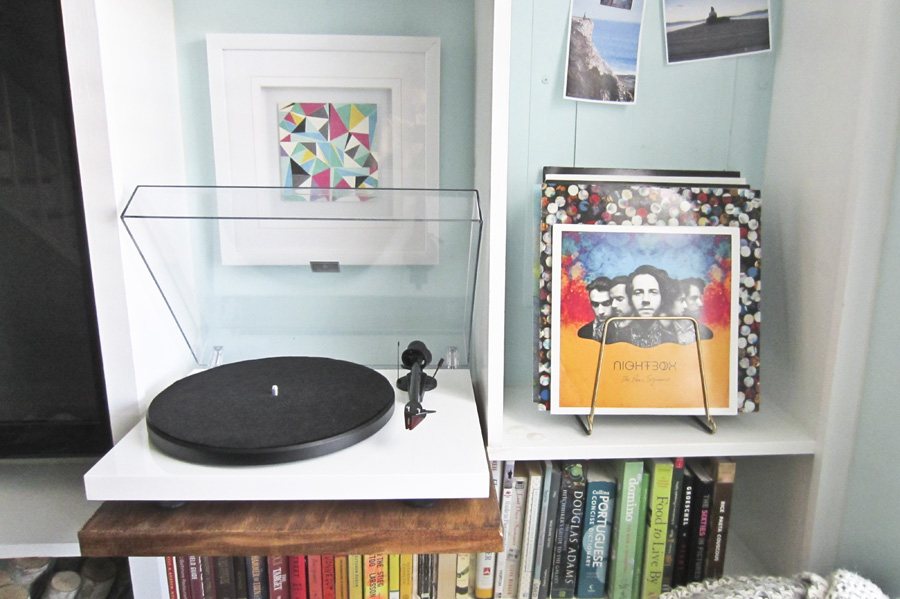
You know you're a hipster when you build a shelf for the express purpose of displaying your record player. You heard right – we officially joined the club a few months ago when Eli got this really awesome turntable for my birthday. We’re still waiting for our membership cards to arrive in the mail….should be here any day now.
In case you haven’t heard the news, CDs and iPods are out and vinyl is back – with a vengeance. No, really. Machines that were once used to produce CDs are now being converted to produce vinyl, and even still there are less than 20 vinyl presses operating in the U.S. In fact, one small shop outside of Prague wisely held onto its machines from the 60s and is now the world’s biggest producer of vinyl records. There’s a little trivia for your Friday afternoon. Tuck that away til your next encounter with a hipster when you can whip it out and amaze them with your brilliant intellect ;)
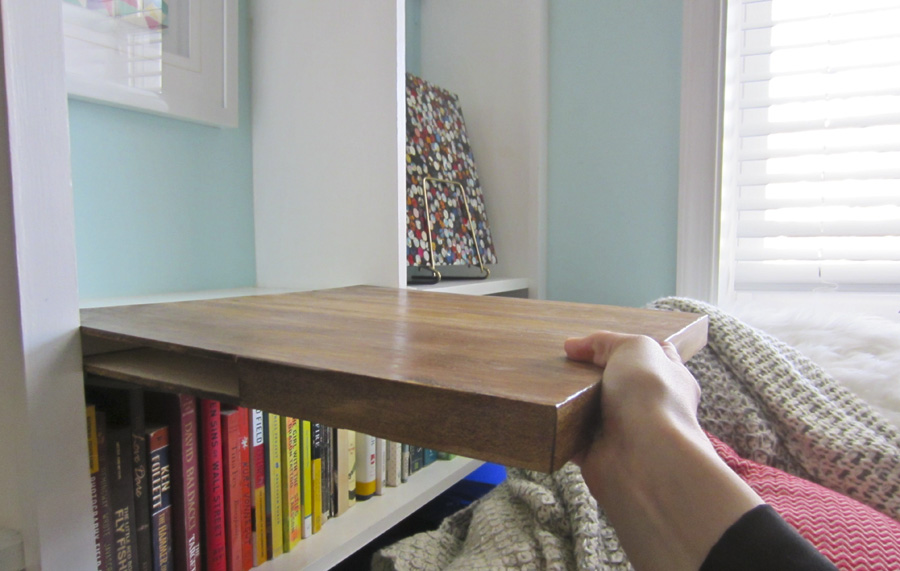
We knew we wanted our new music machine in the main living space because we love listening to tunes while cooking and entertaining – both downstairs activities. In theory, the built-ins seemed like the ideal spot, what with being our media center and keeper of all Eli's speakers, but in reality they’re about 6 inches too shallow to hold a record player. Normally this is where I’d go all *sad trombone* on you, but I refused and instead built a shelf extension. It’s a sleek wooden sleeve that slides onto the front of the bookcase to add several crucial inches of depth without leaving a mark. And while it’s not ideal to have something jutting out from the built-ins, this non-permanent, non-destructive, totally-reversible solution was just the ticket!
Here’s what I used to build it:
- scrap piece of 1 in x 10 in
- 1 project panel of 1/4 in x 2 ft. x 4 ft sanded plywood
- 1 roll of iron-on wood veneer – 2 in x 8 ft white birch
- Wood glue
- Wood filler
- Spackling knife
- C clamps
- Exacto knife
- Sandpaper – rough grit & fine grit
- Wood stain – test pot of Minwax Honey and test pot of Minwax Special Walnut
- Rubber gloves
- Paint brush
- Water-based polyurethane
- Paper towels
- Clothes iron
- Tin foil
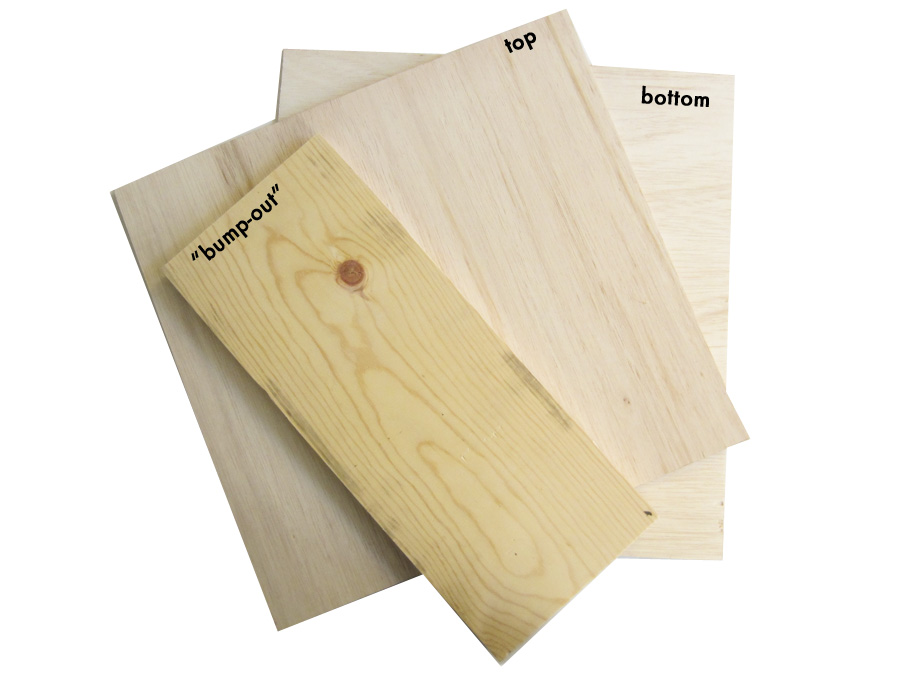
That seems like a lot of supplies, but we had most of them already, and the design is super simple. It’s just 2 pieces of wood slightly bigger than the base of the record player, sandwiched around a third piece of wood that will actually "bump-out" from the existing shelf. Here’s how I made it.
Step 1: Measure the existing shelf and the record player
The space I had to work with was a little more than 17 inches wide and 9.25 inches deep. The width was fine for my ~16 inch wide record player, but I needed at least 4 more inches in depth to fit the base of the player, plus an extra few extra inches to comfortably open and close the dust cover. All things considered, my new shelf needed to be 17 inches wide and 16 inches deep (9.25" existing + 4" bump out + 2.75" wiggle room). I drew these new measurements on my plywood twice – once for the top piece and once for the bottom. For the bump out, I used a scrap piece of 1 x 10 leftover from our built-ins project, and marked my cuts so it would be 17 inches long and 7.25 inches deep (the difference between the existing shelf and the new shelf).
It was important for the thickness of the bump-out wood to match that of the existing shelf so that the "sandwich buns" on top & bottom would fit snugly and hold the extension in place.
Step 2: Cut the wood to size
I used my circular saw to cut everything down to size, though a table saw would have been ideal. I cut as precisely as I could so the edges would line up when I stacked the pieces together, but it was a little tricky with the circular saw and fading daylight, so I figured out a way to handle it later.
Step 3: Assemble the pieces with wood glue
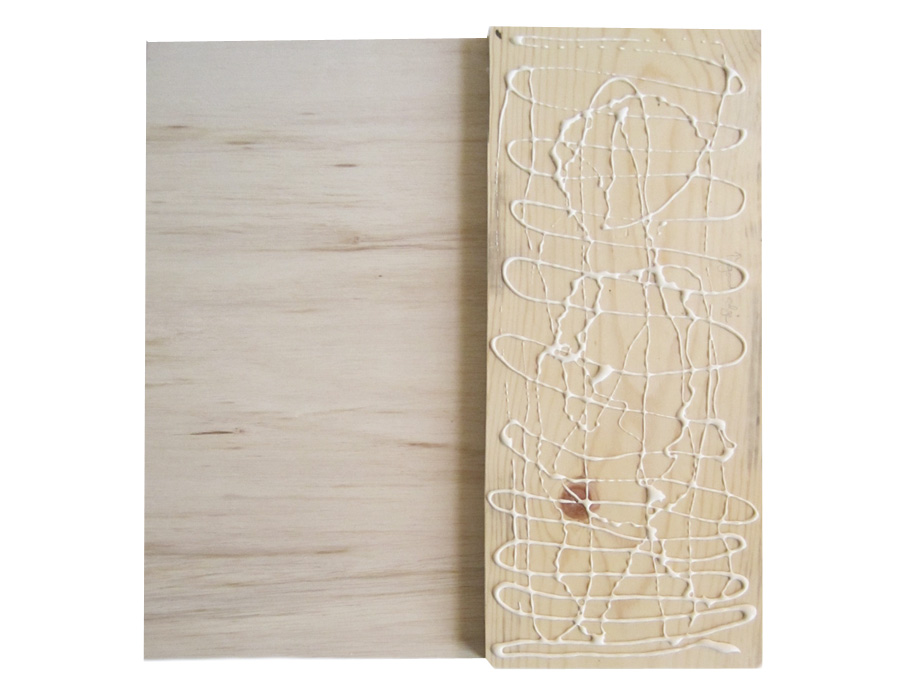
Rather than put nail holes in my shelf I opted to hold it all together with some serious Gorilla Wood Glue. I started by applying wood glue to the inside of bottom shelf where the bump-out would go and then carefully lining up the bump-out piece so the edges squared up nicely.
I pressed down on the bump-out and wiped up the excess glue that oozed out the sides before applying more glue & securing the top piece. It was basically like making a triple decker mayo sandwich, except simultaneously less delicious & more awesome. I used a lot of glue to get a really strong hold but I was careful not to get it on ANYTHING that would be visible in the final product. That’s actually a lie – the first time I made this shelf I was not careful with the glue cleanup and learned the hard way that Gorilla Wood Glue isn’t stainable. Imagine my deep dismay when I thought I was almost done and then my first coat of stain revealed giant, hideous blotches. It looked so bad I had to start over. So take it from me & my mulligan – don’t get glue on anywhere that you're gonna see later!
Step 4: Clamp it together
After the pieces are assembled and the edges are neatly aligned, the shelf needs to be clamped together while the glue dries. It was at this point the first time around that I learned another lesson from the school of hard knocks – protect the plywood! It’s a relatively soft wood, and the clamps leave circular craters if pressed directly into it. On my do-over I slid in some long strips of scrap wood and a flat metal square to shield the wood. Worked like a charm.
While clamping everything down, more glue oozed out, so I kept a paper towel handy to wipe it up carefully. Then I let it all dry for a good 24 hours before removing the clamps.
Step 5: Smooth out the edges and apply the veneer
If I wanted a more industrial look I could have stopped there, with the raw wood and the rough, layered edges. But I was going for polish, so I decided to apply a wood veneer to cover them up. Iron-on veneer is one of my new favorite things, and I'm brainstorming new projects just so I can use it again! It’s nicely finished wood that comes in a roll like ribbon, and it has glue backing that’s activated by heat. It adheres best to a very flat surface, so I needed to address the imperfect cuts I made in step 2 that left me with some slight gaps and juts.
To do that I used wood filler. I like using the pinkish/purple kinds that dry white because they're both fun to look at and keep me from trying to sand it down before it's ready. After it dried I gave it a quick once over with a fine grit paper and then wiped off the dust.
Then I cut 3 strips of veneer to length with scissors, keeping in mind that it was only supposed to cover the edges where the scrap bump-out was visible. I laid out my first piece, covered it with with tin foil, and then ran a hot iron over it for several minutes until it was clearly stuck on. The tin foil bit was a suggestion from the veneer manufacturer to protect the iron from glue, but I’m not sure it was entirely necessary.
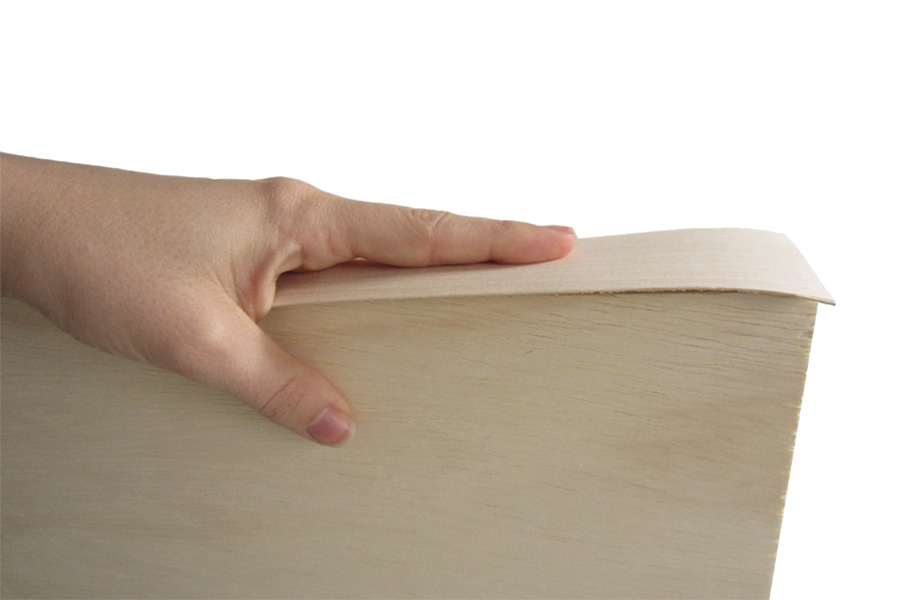


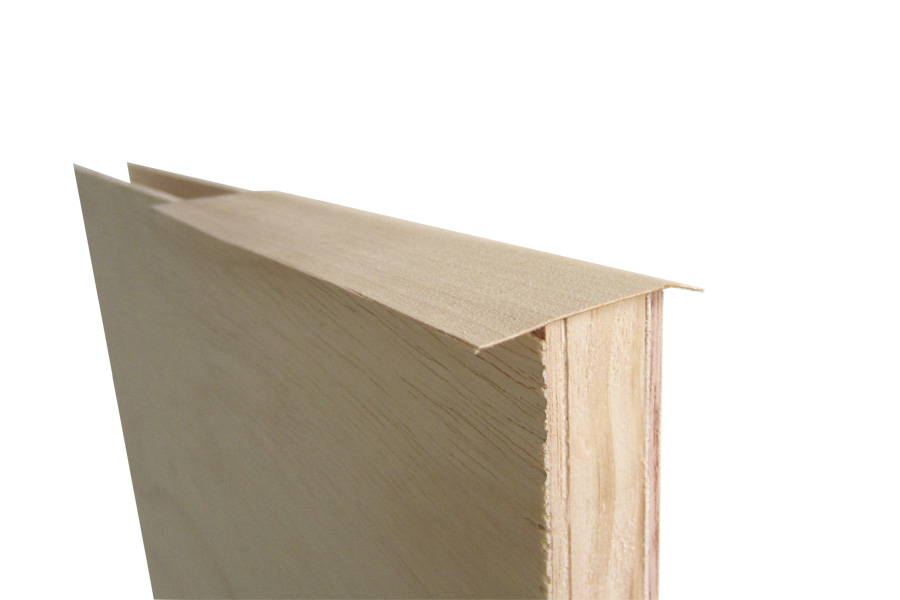
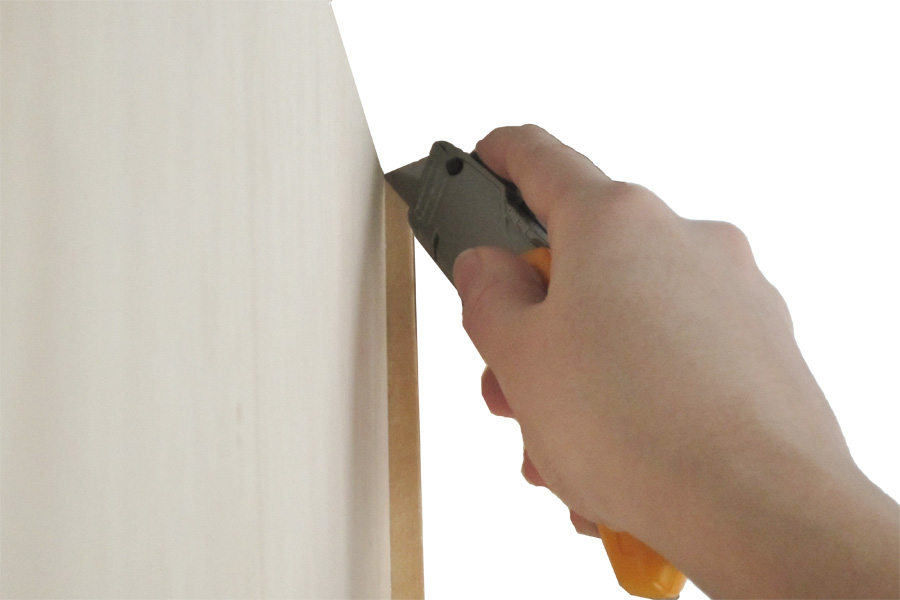
My veneer was thicker than my edges, but I waited til it was on and dry to cut it down to size with an exacto knife. That gave me some leeway with placement, but it also meant I needed to finish one side before moving onto the next one. That way I could make sure my corners matched up nicely...it took a little longer but the payoff was worth it.
Step 6: Sand, stain and finish
I lightly sanded the whole thing with a rougher grit paper to smooth everything out, and then with a fine grit to get it really smooth. It’s always a good idea to sand in the direction of the grain. Then I gave it a good wipe down with a damp paper towel and picked out my stain colors.
I used a combination of Minwax Honey & Special walnut to mimic the look of the acacia wood picture frames already hanging on the other side of the built-ins. My sanded plywood was clearly not acacia, so I got a little creative with my staining technique. I wiped on a light Honey base coat with a paper towel and then added the illusion of acacia intrigue with swoops of Special Walnut.
DIY Record Player Shelf Extension via Little House Big City
The stain was oil-based and the poly I had on hand was water-based. It’s totally fine to use them together as long as you allow extra drying time for the stain, which basically meant forgetting about the project for a couple days. Done and done. When I found a spare hour a few days later, I started applying the “finish”-ing touches. I gave it three coats of water-based poly, with a very light sanding in between the second and third coats.
After the last coat dried I sanded again with 440 grit, wiped off the dust, slid it into its new resting place, and admired my handiwork. The do-over was totally worth it. My lil record player has a happy home in the middle of all the action, where I can easily plug into our mega-loud speakers when it’s time to jam (sorry neighbors).
Disclaimer: There's definitely some physics involved in this project, so please be mindful of the sturdiness of your existing shelf, the type of wood you're using, the amount of depth you're trying to add, and the weight of whatever you're trying to store on the shelf extension. The details in this tutorial are simply what worked for me.

