5 Tips For Creating a Multi-Purpose Room

A laundry room in the city is a rare gem. Most homes around these parts stack the washer and dryer in a small hallway closet. So I was positively giddy when I first walked through our house and saw a laundry room – it's not like it was some dream space worthy of a spread in Martha Stewart magazine (that it most certainly was not), but it's a spare room that just happened to be where we’d also wash and dry our clothes. I guess I was so excited by the extra space that I didn't even notice the total lack of hall or coat closets in the house. Whoops!

Shortly after moving in, it looked like this, painted Buoyant Blue (SW 6483):

Laundry room before

The laundry room happened to have the best natural light on the main floor, which is not exactly where you'd want it if you had to choose, but I thought it might make a nice art room or sewing room – two things I love but don’t do enough. Alas, after living in the house for a few months it was clear that we had more immediate needs, including A) a place to store coats and jackets because Winter Was Coming, and B) an area to enjoy the natural light on a daily basis because that stuff is in short supply around here.

There are a handful of general guidelines I follow when making a small space work harder and which helped me a lot when thinking about this room. Here's what it looks like now...

Multi-purpose room for laundry, dining, and storage

1. Utilize vertical space

When you can't spread out, go up. If you’ve checked out the house tour, then you know the first step to making the room more useful was swapping out the new & perfectly good side-by-side machines that came with the house in lieu of a stacking pair. I really hate replacing new appliances, but I couldn’t see any way around it. We picked up these Samsung beauts from Best Buy during their Columbus Day sale and planned to Craigslist ours in the month it would take for the new ones to arrive. HA! As it turns out, it’s very difficult to sell side-by-side machines in the city – ain’t nobody got space for that. Before I knew it, the new machines arrived, the old pair were still hanging around and we were up to our eyeballs in washers and dryers! Eventually we found a new home for them in a local hair salon and recouped some of the cost of the new machines.

Stacking Samsung washer and dryer open up space for an Ikea PAX wardrobe and Billy bookcase

By going vertical with the washer and dryer, we gained space to slot in an Ikea PAX wardrobe, AKA our wintry-weather station where we store coats, winter boots, umbrellas, scarves, hats and gloves. I was confident the PAX would be up to the task because I'd seen it used as such on House*Tweaking. We capped the other end of the W/D with a Billy Bookcase from Ikea – another vertical storage space great for small areas because it’s only 11 inches deep. I’m not sold on the arrangement, though  – it's looking hodgepodge because the lines aren't flush (the tree stand and medicine cabinet on top are doing me any favors either), but it’s too functional to give anything up right now. In the meantime, you best believe I'm brainstorming ways to make this wall more cohesive. I'll share some plans in a future post.

Ikea PAX wardrobe used as a coat closet
Billy Bookcase filled with baskets for pretty storage

2. Use baskets for pretty storage

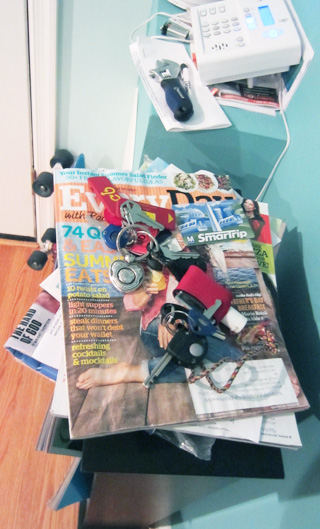
Baskets are about as old as time, but they’re practical and add rich, natural texture to a space. I use them in the bookcase to store and disguise detergent, cleaning supplies, extra TP and paper towels – typical laundry room stuff – as well as totally random household things, like Catch Phrase, board games, bike helmets, and guilty-pleasure books I don't want to show off on the built-ins. Baskets are great in multi-purpose rooms because they supply order and visual consistency when you've got a whole smorgasbord to store. In fact, I need to pick up another one for those gardening tools.

3. Seating that doubles as storage

I fashioned corner seats using 2 Ikea benches that each have a bottom shelf where I can hide more stuff in (you probably guessed it…) baskets! Gotta keep my 20 cans of spray paint somewhere! These benches are actually categorized by Ikea as bathroom storage – but you guys won't judge me for that will you? I added some pillows for back and tush, so I'm fairly confident that promotes them to real seat status. The benches & pillows bring in natural wood and graphic patterns so the room is not white on white on white. And in addition to table seating, I plop down here to pull my boots on in the winter since it's conveniently located by the "coat closet." 

Ikea benches add storage space to this breakfast nook

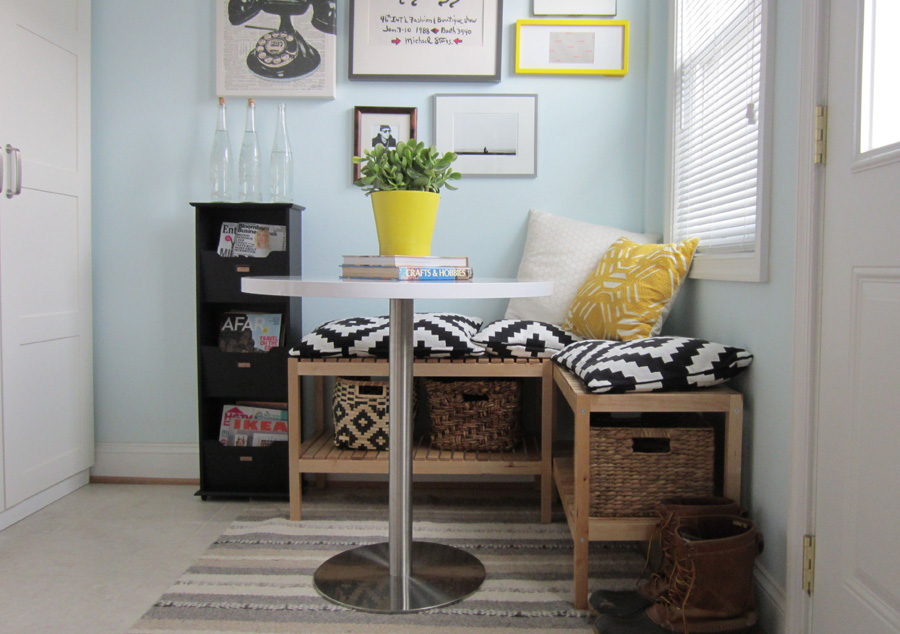
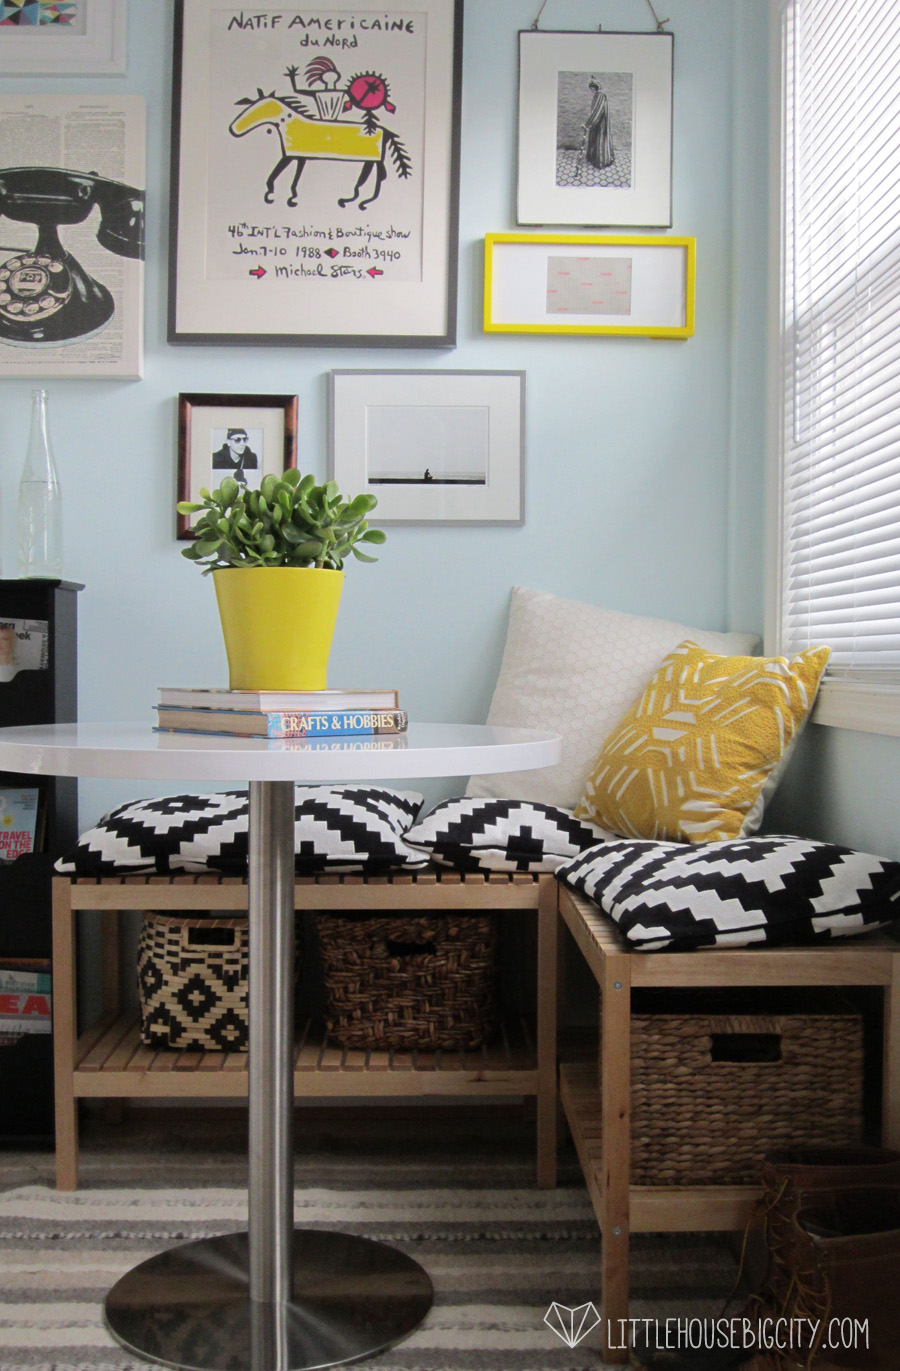
4. Round tables are the tops

Who says you can't eat breakfast in your laundry room?! A round pedestal table is great for small space dining for a few reasons. For one, it’s less obtrusive – the curves feel more organic and there are no sharp edges to knock into. Secondly, you can fit more people at a table when you take corners and table legs out of the equation. By employing benches as banquette-style seating, I was also able to push the table into the corner so it's really out of the way but still totally functional. If I've got more people to seat I can easily grab a couple chairs from the dining room or office to slot in. 

Round white table in breakfast nook with gallery wall in the background

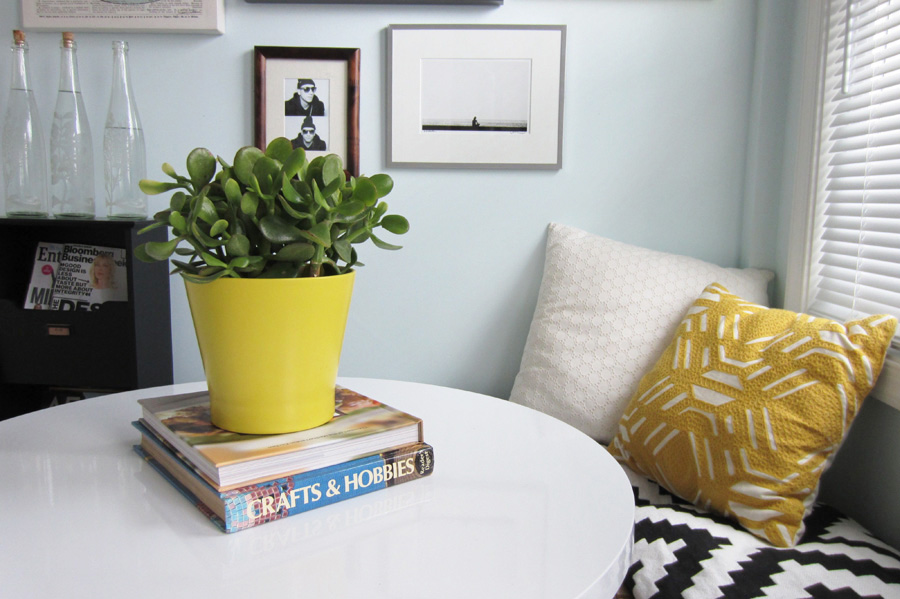
I really wanted a small Saarinen tulip table but couldn’t find one that was the right size and fit my budget, so I settled for this sorta lookalike on Amazon. It's definitely a poor man's version, but I'm plenty pleased with it, especially given the price differential.  I spend my mornings at this table writing blog posts, and on the weekends this is where Eli & I eat breakfast and drink coffee. It pulls triple duty on laundry day, when we use it as a folding table. (I swear we usually have more laundry!)

Breakfast table serves as folding table in the laundry room

5. Multi-purpose everything

In case you didn't pick this up from the other 4 guidelines, the real trick to making a space work harder is to choose items that fit multiple needs. Think beyond their prescribed use. A breakfast table is also a work station and laundry-folding table. Benches work as table seating, storage and plopping zone. Baskets store any multitude of items and add a lil somethin' somethin' aesthetically. When you utilize pieces for multiple purposes, you get a room for eating breakfast, doing work, storing household miscellanea, suiting up to face the elements, and oh yeah – washing clothes. The added perk is that I have so many reasons to hang out in this room and enjoy the natural sunlight beamin' on my face.

Sunny breakfast nook with gallery wall and Ikea benches

The sixth, seventh and eighth unspoken rules for me are: Ikea, Ikea, Ikea. Sure, there's some not-unfounded snobbery in the design world against buying IKEA furniture, but it's very hard to beat the price and utility. I still have some work to do with the bookcase/wardrobe/washer/dryer situation, but in the end I think IKEA is gonna pull through for me functionally, economically and aesthetically in this room. 

What about you guys? Do you have a room in your house that's pulling double (or triple) duty?

Vintage Gems: Hunted House for the Mid-Century Modern Lover

Since moving to DC, thrifting has become one of my favorite hobbies – though perhaps a slightly masochistic one. Living in a small house with constrained dimensions and no garage, basement or attic, it’s unreal the number of awesome pieces of furniture I pass up because I don’t have “the perfect spot” nor a place to hoard them for future enjoyment. (Note to self: I need to build a garage ASAP) The vintage shops here always have me swooning and cursing the little-house gods and that coffee table I bought on Amazon. But just like any good addict – I mean hobbyist – I keep going back because I can’t stop, won’t stop. And some day I'll find the perfect petite leather sofa of my dreams before that other guy snatches it up. 

I’ve had a few years to try out the shops around town and have come to truly love a handful of them. Each has its own distinct personality and aesthetic – every time you shop you learn a little more about who they are and what you can depend on them for. I think I'm ready to take the next step and so I'd really like to introduce you to the shops I'm going steady with. This week we're visiting Hunted House – the Don Draper of vintage stores. Sophisticated, mid-century, handsome, expertly tailored, impeccable jaw line…wait, are we still talking about furniture?

Hunted House store front in DC

You can always depend on Hunted House to have an impressive stock of mid-century Scandinavian pieces in great condition and at relatively good prices. More than any other store in the city, it is committed to a look. That look happens to be one of an advertising executive's home circa 1960s, minus the smoke and the Scotch. It also happens to be a look I (and 10 million other people) love.

The store was previously located on 14th St. NW, which is pretty much the end-all be-all as far as store locations go. They moved a couple years ago to H St. Corridor in the Northeast part of the city, which is not quite as hoppin’ as 14th (though it won't be long) and it's certainly harder to get to for most people. If you're smart you know this is actually a huge advantage, and you should go now – quick! – before the competition heats up for all the goodies. 

Retro leather desk and chair
Vintage globe
Apothecary glasses

Lamps, leather and lucite – this shop rolls deep in the three L's. I'd love to snag a pair of those lucite desk chairs for the office/guest room!

Lucite desk chair and danish mid century desk with brass desk lamp.

I very much wish I had a large dining room to host 6 of my closest friends at this beautiful teak table while we listen to smooth jazz on the record player and eat fondue.

Danish modern round to oval teak dining table by Dyrlund circa 1960s / 1970s

I first found this shop when I was on the hunt for a small credenza to hold the TV. They keep a really good selection here in a variety of sizes, styles and finishes. Broyhill credenzas like this one make me question my decision to go with built-in shelves. Mmmm...  Also note the incredibly stylish and comfortable leather chair and the naked-lady salt-n-pepper shakers. No Mad Men home is complete without those. 

Broyhill "Emphasis" Long Credenza – 1960s

This bar is all sorts of awesome – loving those salmon-colored bar stools – and now i have a strange urge to order a dirty martini (I don't drink martinis). Odds are good that I'm going back for those teak cups. They are begging for a luau, and I still need to throw a housewarming party. 

Danish teak mid century cups
1960s Danish Mid-Century Bar with Salmon Stools
Danish Armoir with vintage fan and bowling ball lamp
Mid century Black leather slipper chair
Vintage Beware of Pick Pockets Poster

Big thanks to Mark Johnson, co-founder of Hunted House, for curating and maintaining one of my favorite stores in D.C. This post was not sponsored in any way – I'm just a fan of the shop and was feeling guilty keeping it all to myself. If you live in the area or are stopping through, make sure you check it out!  These pics are only the tip of the iceburg, and the inventory is constantly changing.

Mark Johnson, owner of Hunted House

Anyone know what that style of chair is called? I want to guess Egg, but I'm probably wrong. Any favorite pieces catch your eye?

Ikea Hack: Geometric Magazine Holder

Ikea Hack: Geometric Magazine Holders

When E & I shared less than 500 sq. ft. in our previous apartment, we quickly learned that a jacket on the bench, shoes in the living room, a stack of mail on the table and an empty glass on the desk were all it took for the place to feel like a wreck. Suddenly 500 square feet feels like 300 square feet, and everything is just a liiiiittle more irksome. If you’re in a bigger space, clutter doesn’t really feel like clutter because it’s not invading your line of sight and you can live in blissful ignorance as the stuff spreads out instead of up. ;)

…Well, we don’t have quite that much space. My definition of clutter has gotten a tiny bit more lenient now that we’re in a house, but order is still crucial to making our space feel – y’know – spacious. The first area to tackle was our landing zone – the place we turned to upon walking in the front door to unload all the mail we just carried in, in-cah-luding that latest issue of Rachael Ray.

Messy magazine rack
Top of messy magazine rack

Beautiful. Just what you want to see when you come home! My landing zone, besides looking generally chaotic, was getting FULL UP with old issues of RR. I started subscribing on my mom’s recommendation a few years ago because I dread the grocery store and the idea of planning a meal every night, and frankly RR makes it easier. I will never ever claim to be an amazing cook – it just ain’t my bag. But if I diligently follow a recipe provided by a trusted professional, I’ve got a 50/50 shot of making something I’d actually want to eat. I should probably just invest in a single cookbook, but there are a handful of recipes in those issues that I’ve tried and succeeded at. So they basically comprise my entire cooking arsenal and now I can never throw them away!

Instead I made these wooden geometric magazine holders to bring order to the mayhem – an Ikea Hack that cost less than $15 and maybe an hour to do. Totally worth it, everyone should do it.

Magazine holder DIY supplies

WHAT YOU NEED

• KNUFF Magazine Files from Ikea – $10 for 2

• Craft paint (white & accent color) – $1.25 each

• Black Fine Tip Sharpie – 75 cents

• Ruler – 25 cents

• Small Paint brush – $2

• Pencil – 25 cents

Step 1: Draft horizontal guide lines

Use your ruler and a pencil to trace horizontal lines going around the file. I eyeballed the spacing to be about 1 ½” between each line, doing my best to keep my ruler level & my lines parallel.  When moving on to a new side of the box, I would line up the ruler so it matched the lines on the side I just finished. That way the lines are consistent all the way around.

KNUFF file folder DIY

Step 2:  Flip that ruler on its side and do it again! 

Sort of. You could do the exact same thing horizontally, but then you would have squares. That wasn’t quite the look I was after, so I spaced my vertical lines about an inch apart. My ruler was coincidentally an inch wide (not actually a coincidence), so I was able to trace both edges of my ruler, scoot the ruler over an inch and do it again. Working my way around like this meant my pencil lines were all evenly spaced and parallel. Pow! Pow!

Step 3: Connect the dots

Instead of connecting the corners of each and every rectangle individually, you can connect the corners of a whole diagonal row at a time using your ruler. Don't be alarmed if they're not matching up perfectly every time. These are just your guide lines, they'll be covered up later.

vertical-lines-ruler-file.jpg
connect-corners-ruler.jpg

Step 4: Paint your triangles

Next, use your paintbrush and white craft paint to start coloring in some triangles. I tried this out two different ways – first, I tried painting triangles that halved each rectangle and then I tried painting smaller triangles quartered each rectangle. I think I like the latter better, but the white is really subtle on the light wood, so the difference between the two is not all that drastic. I only used one coat of paint which gave it a very cool whitewash, two-tone wood look. I love the subtlety ("Subtlety" is a weird looking word).  Don’t be too anal about painting inside the lines, it’s actually better to cover your pencil marks to create a sealed base for your black Sharpie to go over. Because the white is light, you can still clearly see your lines. 

files-half-white-triangles.jpg
files-quarter-white-triangles.jpg

Step 5: Retrace your lines for real this time

After the paint dries (which took all of 10 minutes for me), use the ruler and pencil marks as your guide to retrace all the lines in Sharpie. Like I mentioned in the last step, it's best to draw over the dry paint. These holders are wooden, which makes them feel more substantial, but it turns out that Sharpie bleeds when you draw on wood. That's not a good look. So draw over your dry paint and delight in your crisp black lines.

Step 6: Move on to the next one

After I finished the first magazine holder, I laid the two next to each other and lined it up, so I could draw my lines in the same place. This way they pretty much appear to be one big file when pushed together.

lining-up-files.jpg

Step 7: Trim it out with an accent color

I chose yellow, as I often do, but you can use whatever color you like. I washed out and dried my paint brush, and then used it to carefully line the exposed edges with yellow paint. I considered painting inside the file too, for an extra pop, but ultimately decided that was a risk I didn't want to take. It could have created a sticky surface for my precious mags. 

accent-color-magazine-rack.jpg

That’s it! Fill them up with your own collection of RR – or Vogue or Vanity Fair or Rolling Stone or whatever you collect. I set up my new cooking library on the built-in shelves in the living room (a mere 10 feet from the kitchen). Eventually I’d like to have some floating shelves or an open-ended cabinet in the kitchen to set these on. That would be more logical and might encourage me to start cooking again. ;)

As for the big magazine rack, it’s sighing with relief that it’s no longer overrun with RR. It’s got a new home by my breakfast nook, where it has a frequently changing selection of lighter reading. 

magazine-holders-bookshelves.jpg
magazine-rack-sneak-peak.jpg

Sounds easy enough, right? For $15 and an hour of time, these puppies made a big difference.